 Pin to board
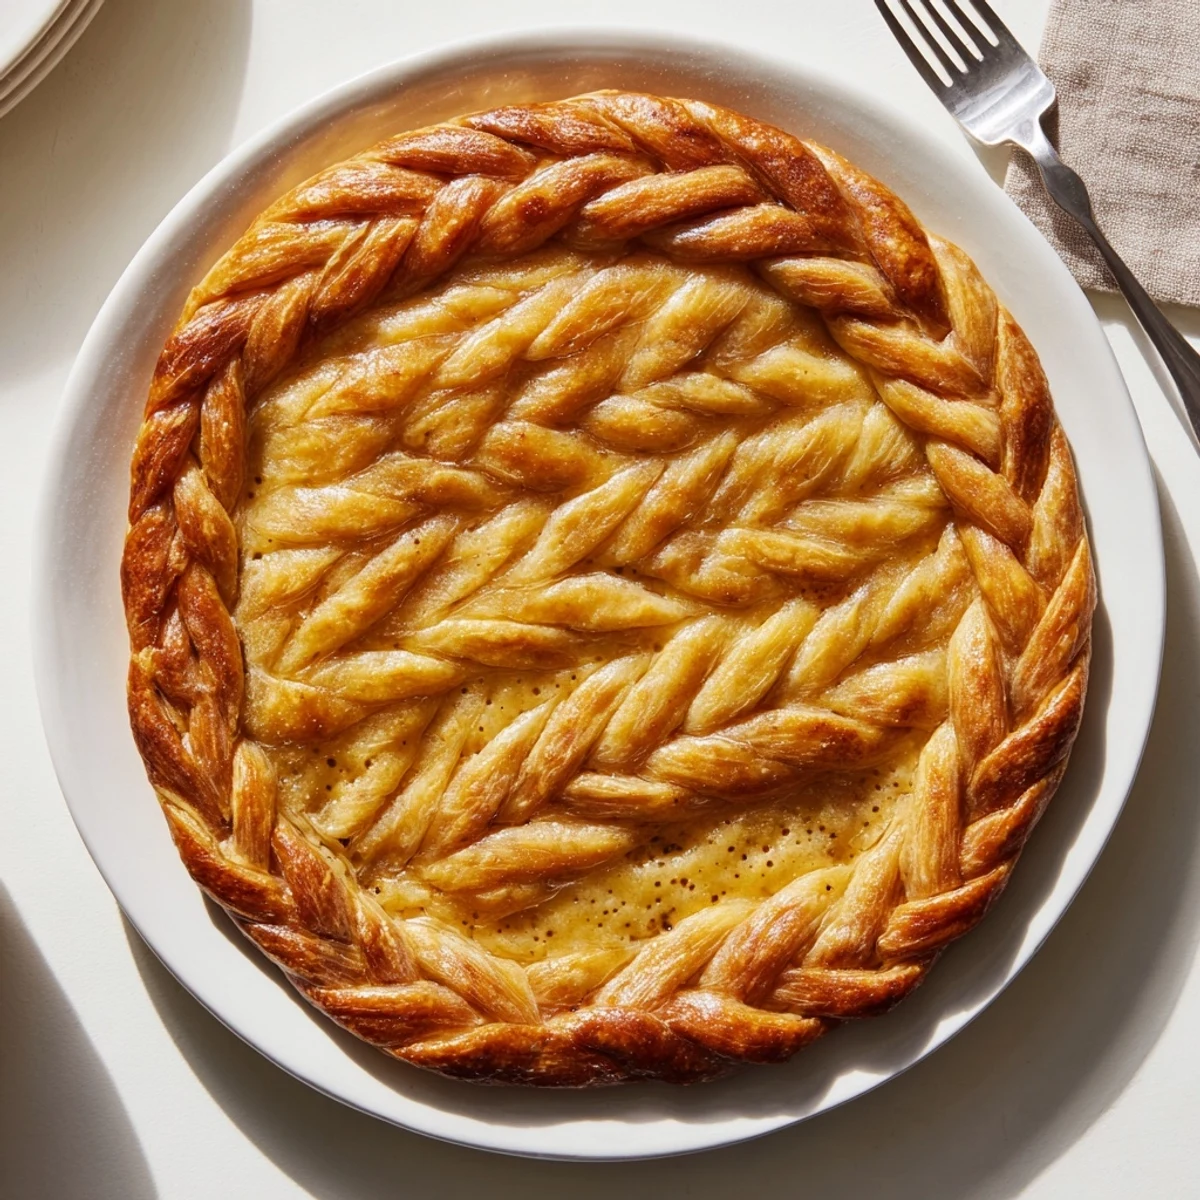
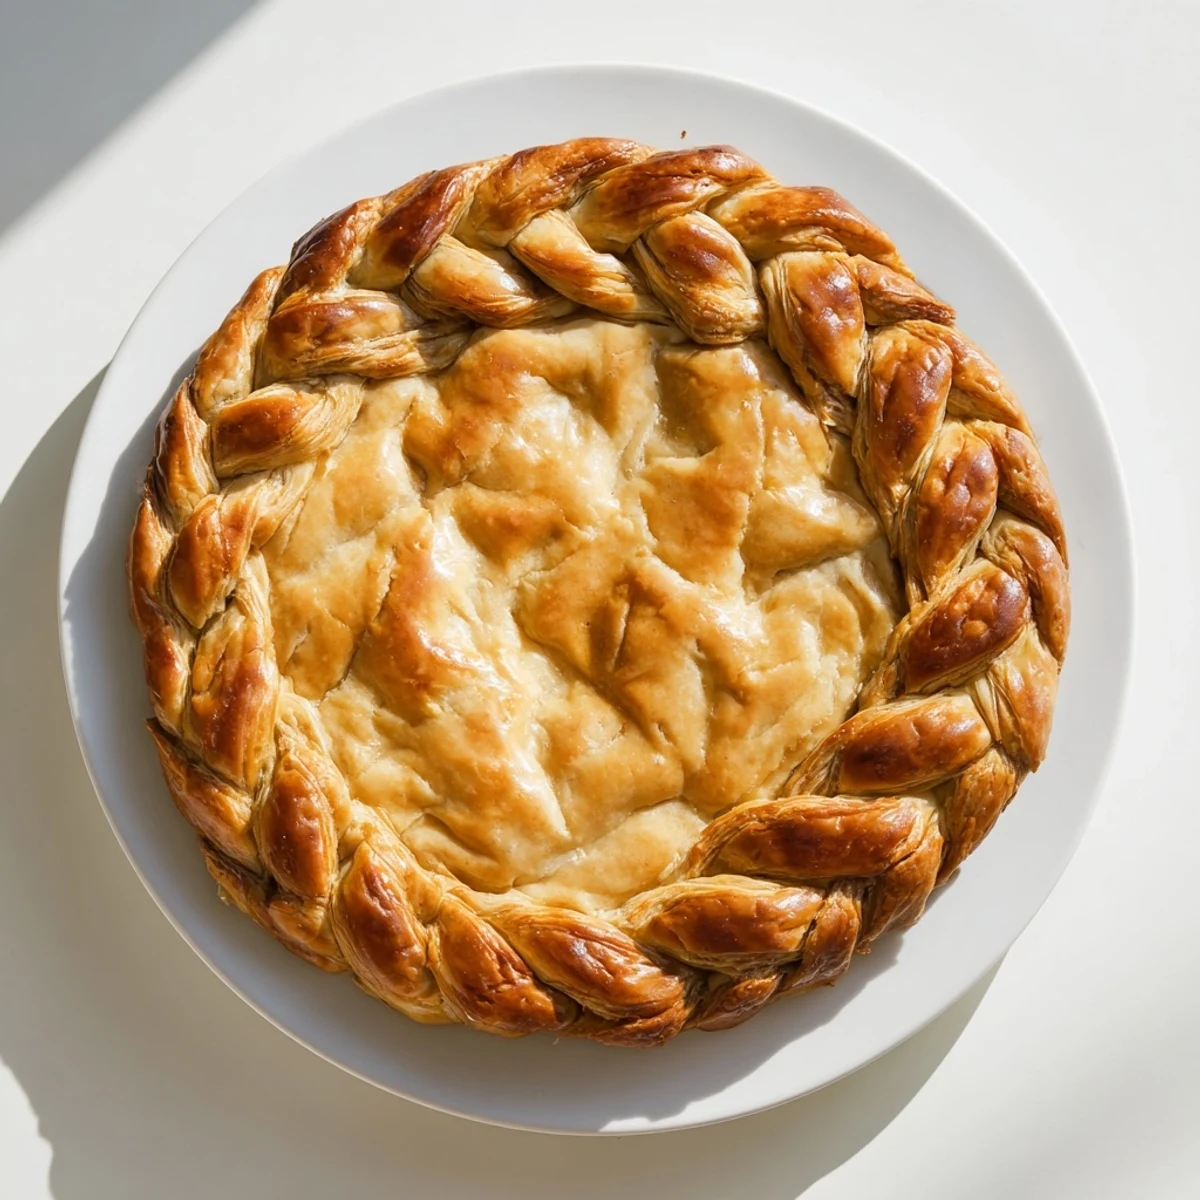
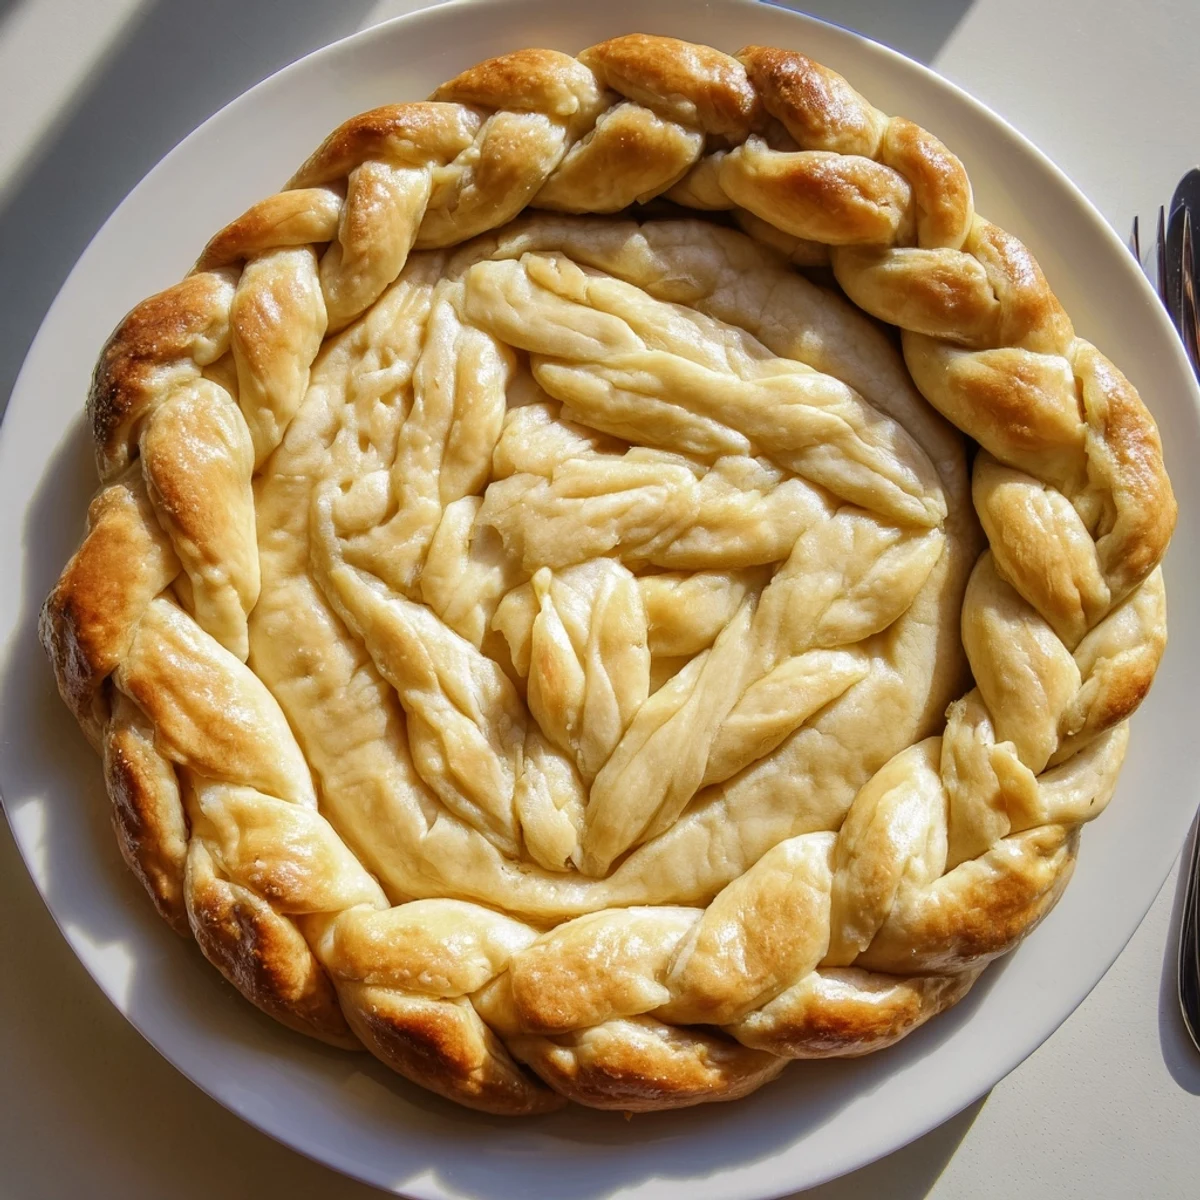
 Elevate your homemade pies with a sophisticated fishtail braid crust that creates bakery-worthy presentation. This decorative technique transforms basic pastry into an edible work of art, perfect for special occasions or when you want to impress guests. The method involves weaving four strips of dough in an intricate pattern, resulting in a stunning braided border that catches everyone's eye. While the process requires patience and practice, the results are absolutely worth the effort.
The first time I attempted a braided pie crust, I was actually procrastinating on a work deadline. My kitchen became a sanctuary of flour-dusted chaos, and somehow that intricate weaving became the most calming thing I'd done all week. There's something almost meditative about the rhythm of over, under, over—and the way something so simple transforms into something bakery-beautiful.
I brought this braid-edged apple pie to a Friendsgiving last fall, and honestly, people spent more time photographing it than eating it. My friend Sarah jokingly accused me of buying it from a fancy bakery, which I took as the highest compliment. The best part? It was my first time trying the fishtail pattern, and even my slightly messy attempt looked gorgeous.
Ingredients
- 2 1/2 cups all-purpose flour: The foundation of everything flaky and good—dont pack it down when measuring
- 1 cup cold unsalted butter: Keep this ice cold, seriously, it's the difference between tender pastry and tough disappointment
- 1 tsp salt: Enhances all the buttery flavor without making it taste salty
- 1 tbsp sugar: Just enough to help with browning and add subtle sweetness
- 6-8 tbsp ice water: Add this gradually and trust your hands more than the exact measurement
- 1 egg beaten: The secret to that gorgeous golden shine
- 1 tbsp milk: Thins the egg wash for easier brushing
Instructions
- Make the dough foundation:
- Whisk flour, salt, and sugar in a large bowl, then cut in cold butter until the mixture looks like coarse crumbs with some pea-sized butter pieces remaining. Gradually add ice water, mixing gently with your hands until the dough just comes together, then divide into two discs and chill for at least an hour—the cold butter is what creates those flaky layers we love.
- Prep your canvas:
- Roll out one disc and press it into your 9-inch pie plate, trimming the edges neatly and popping it in the fridge while you work on the braids. Roll the second disc to about 1/4 inch thickness and cut twelve long, even strips—I use a pastry wheel for that pretty wavy edge, but a sharp knife works perfectly fine too.
- Master the fishtail braid:
- Group your strips into sets of four, pinching the tops together securely. Working left to right, take the outermost strip and weave it over, then under, then over the adjacent strips, repeating with whatever strip becomes the new leftmost one. It feels fussy at first, but your hands will find the rhythm after the first or second braid.
- Apply the braided border:
- Carefully transfer each finished braid to the chilled pie edge, pressing gently to seal and trimming any excess. A dab of water helps everything stick together if needed. Give the whole pie another 15-minute chill before brushing with egg wash and baking at 400°F until deeply golden and gorgeous.
 Pin to board
 My niece helped me make a cherry pie with this crust last summer, and she was so proud of 'our fancy pie' that she insisted on calling everyone she knew to describe the braiding technique. That's the thing about showstopping baking—it creates memories that stick around way longer than the crumbs.
Getting the Most Flaky Results
I've learned that the most common mistake with pie dough is overworking it, which develops tough gluten instead of tender flakes. Work quickly, keep your ingredients cold, and stop mixing as soon as the dough holds together when you squeeze it. Those visible butter pieces you might worry about? They're exactly what creates those beautiful flaky layers as they melt in the oven.
Troubleshooting Your Braids
If your strips keep breaking or feel too soft to handle, pop everything back in the fridge for 10 minutes and try again. Cold dough is much more cooperative, and there's no shame in taking breaks. I've also found that slightly wider strips are easier to work with than thin ones when you're first learning the fishtail pattern.
Timing Your Baking Perfectly
Blind baking can feel like an extra step, but it prevents that dreaded soggy bottom crust, especially with fruit pies or custards. Keep an eye on the color—you want deep golden brown, not pale blonde. If the edges start browning too quickly, a pie shield or some aluminum foil folded around the rim will protect them while the center finishes baking.
- Chill your pie plate in the freezer while preheating the oven for even better results
- Brush the egg wash carefully so it doesn't pool in the braided crevices
- Let the pie cool for at least 2-3 hours before slicing so the filling sets properly
 Pin to board
 There's something deeply satisfying about serving a pie that looks this impressive, knowing the technique is completely within reach. Maybe that's the best kind of kitchen magic—the kind anyone can master with a little patience and practice.
Recipe FAQs
- → What makes fishtail braiding different from regular braiding?
-
Fishtail braiding uses four strands instead of three, creating a flatter, wider woven pattern that resembles a fish skeleton. The technique involves crossing the leftmost strip over, under, and over adjacent strips repeatedly, producing an intricate herringbone-style design that's more decorative than traditional three-strand braids.
- → Can I make this crust ahead of time?
-
Absolutely. Prepare the dough discs and chill for up to 2 days, or freeze for 3 months. You can also complete the braiding step, then freeze the entire assembled crust unbaked. When ready, bake from frozen, adding a few extra minutes to ensure thorough cooking throughout the pastry.
- → Why does my dough keep tearing when braiding?
-
Dough that's too warm becomes difficult to handle and prone to tearing. Keep your working surface lightly floured and work quickly. If dough becomes soft, return it to the refrigerator for 10-15 minutes to firm up. Cold butter chunks within the dough create the flaky texture but also make the dough more fragile when warm.
- → Do I need to blind bake this decorative crust?
-
Blind baking ensures the intricate braid cooks through completely and maintains its shape. Without this step, the bottom crust might remain soggy when filled with wet ingredients. The weighted lining prevents puffing and guarantees even browning, especially important with the thicker braided edge.
- → Can I use store-bought refrigerated pie dough?
-
Yes, though homemade dough yields better results due to optimal butter content and texture. If using store-bought brands, allow extra time to let the dough soften slightly before cutting strips. Work quickly as commercial dough warms faster, and consider chilling strips briefly before braiding for easier handling.
- → How do I prevent the braid from burning during baking?
-
The egg wash creates a beautiful golden color but can accelerate browning. Watch carefully during the final minutes and tent with foil if darkening too quickly. Position your oven rack in the center position for even heat distribution, and avoid placing too close to the top heating element.
