 Pin to board
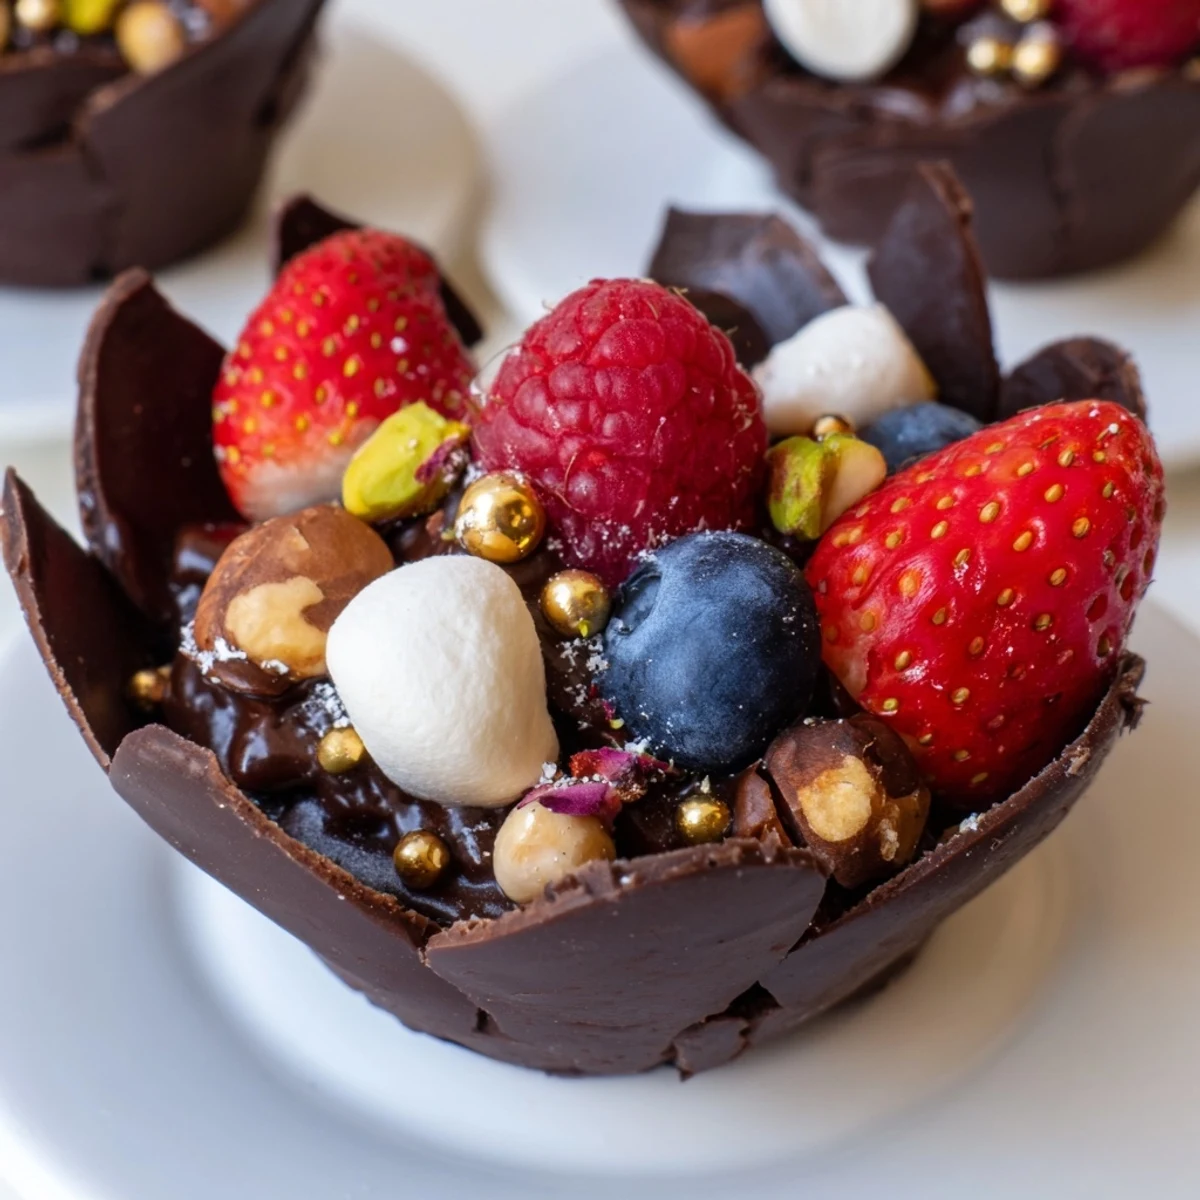
 Create stunning chocolate grazing cups featuring handmade dark chocolate cups filled with silky chocolate mousse. These elegant individual desserts showcase layers of creamy mousse topped with fresh mixed berries, crunchy chopped nuts, mini marshmallows, and chocolate curls. Perfect for dessert tables, dinner parties, or special celebrations, these indulgent cups combine rich chocolate flavors with fresh, textural contrasts. The entire process takes just over an hour, including chilling time, and yields six impressive servings.
The summer my daughter turned eight, she begged for a fancy dessert party. I'd never made chocolate cups from scratch before, and honestly, I was terrified they'd collapse. But watching those little faces light up when they each got their own edible chocolate bowl made every minute of experimentation worth it.
Last Valentine's Day, I made a batch for a dinner party and my friend Sarah actually gasped when I brought them out. She swore she'd never be able to make something so elegant. Later that night, I caught her sneaking a second cup from the fridge when she thought no one was looking.
Ingredients
- 200 g dark chocolate (at least 60% cocoa), chopped: Higher cocoa percentage creates sturdier cups that won't melt as quickly in warm hands. I've learned through trial and error that cheap chocolate creates brittle, disappointing shells.
- 200 ml heavy cream: Must be very cold before whipping. I stick my mixing bowl in the freezer for 10 minutes first, a trick my grandmother swore by.
- 100 g dark chocolate, chopped: For the mousse filling. Let it cool slightly after melting so it doesn't deflate your whipped cream.
- 2 tbsp powdered sugar: Adds just enough sweetness without making the mousse cloyingly sweet.
- 1 tsp vanilla extract: Pure extract makes a noticeable difference here.
- 1 cup fresh mixed berries: Raspberries, strawberries, blueberries—whatever looks brightest at the market. The tartness cuts through all that rich chocolate beautifully.
- 2 tbsp chopped nuts: Hazelnuts, almonds, or pistachios add essential crunch. Toast them first for deeper flavor.
- 2 tbsp mini marshmallows: These are pure whimsy and fun.
- 2 tbsp chocolate curls or shavings: Use a vegetable peeler on a room temperature chocolate bar for effortless curls.
- 1 tbsp edible gold leaf or pearls (optional): Totally unnecessary but makes everything feel festive.
Instructions
- Create the Chocolate Cups:
- Melt 200 g chopped dark chocolate in a microwave-safe bowl or over a double boiler until smooth, stirring every 30 seconds. Let it cool slightly so it's not hot to the touch but still fluid.
- Form the Cups:
- Using a pastry brush or the back of a spoon, coat the insides of 6 silicone or paper cupcake liners with melted chocolate. Work quickly and create an even layer about 1/8 inch thick. Place liners on a tray and chill for 20 minutes until completely firm.
- Unmold Carefully:
- Once set, gently peel away the liners starting at the edges. If using paper liners, you might need to briefly warm them with your hands first. Set chocolate cups aside on a chilled plate.
- Whip the Cream:
- In a chilled bowl, beat heavy cream with powdered sugar and vanilla until soft peaks form. Don't overwhip or you'll get grainy mousse.
- Make the Mousse Base:
- Melt 100 g dark chocolate and let it cool until just warm. Fold one spoonful of whipped cream into the chocolate to lighten it, then gently fold the chocolate mixture back into the remaining whipped cream until no streaks remain.
- Fill the Cups:
- Pipe or spoon chocolate mousse into each chocolate cup, filling about two-thirds full. Leave room for those gorgeous toppings.
- Garnish Generously:
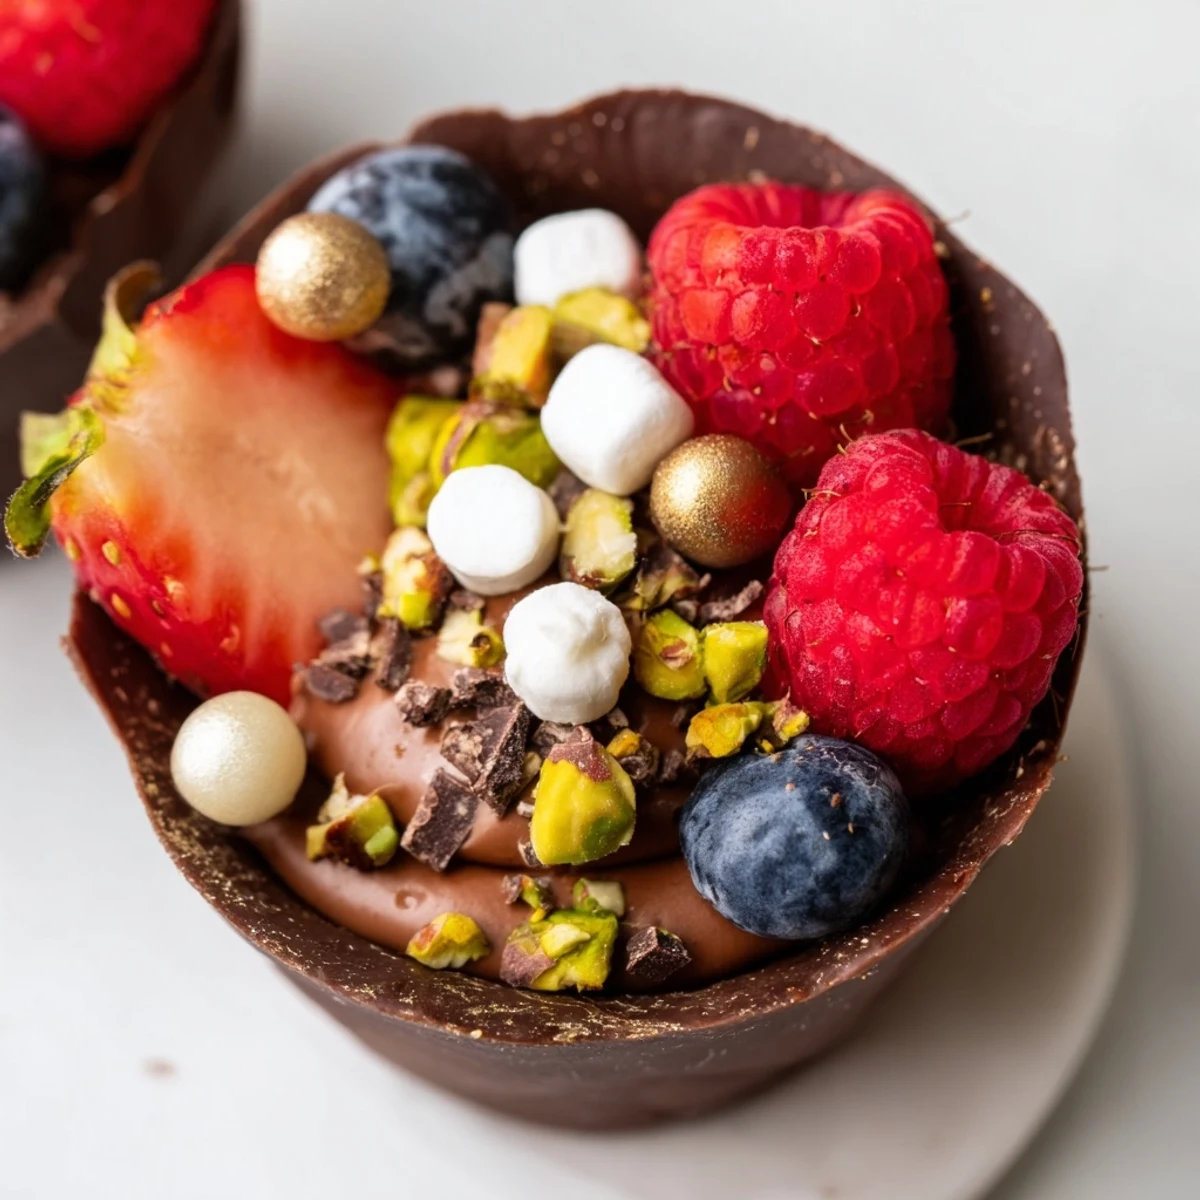
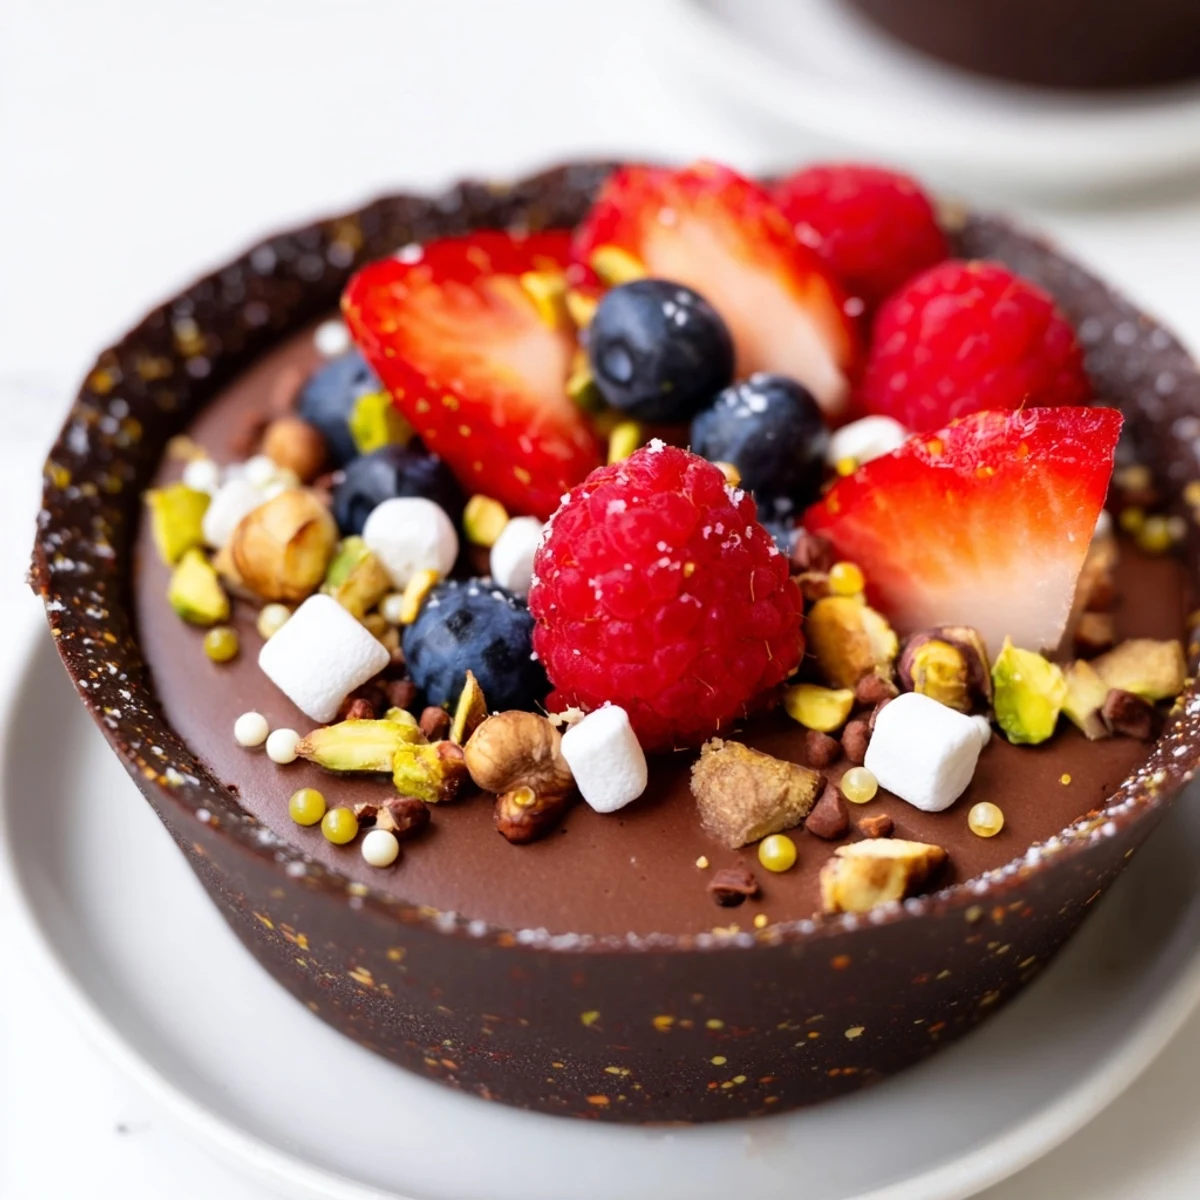
- Top with fresh berries, chopped nuts, mini marshmallows, and chocolate curls. Add edible gold if you're feeling fancy.
- Final Chill:
- Refrigerate assembled cups for at least 20 minutes before serving. This lets the mousse set and flavors meld together.
 Pin to board
 My mother-in-law still talks about the Christmas I made these for our family dessert. She's not easily impressed by sweets, but she asked for the recipe before she even finished her first cup. Now it's become our special occasion tradition.
Making Ahead Like a Pro
I learned the hard way that these are best assembled the same day. Chocolate cups stay perfect in the fridge for up to 3 days stored in an airtight container. The mousse holds well for 24 hours, but after that it starts weeping and losing its airy texture. Trust me, serve fresh.
Playing with Flavors
Sometimes I swap white chocolate for the cups and make a dark chocolate mousse for stunning contrast. One adventurous evening, I added orange zest to the mousse and a splash of Grand Marnier. The way the citrus notes danced with the dark chocolate was absolutely revelatory.
Presentation Secrets
Arranging these on a pretty platter transforms them from dessert to centerpiece. I like to vary the heights of toppings so each cup looks unique. Scatter extra berries around the platter for that abundant, grazing table aesthetic.
- Clear glass serving plates show off the chocolate cups beautifully
- Keep extras chilled and swap in fresh ones as the platter empties
- Small dessert forks or spears make grazing easier and less messy
 Pin to board
 There's something deeply satisfying about watching friends discover these little cups of joy. Hope they bring as much delight to your table as they've brought to mine.
Recipe FAQs
- → Can I make the chocolate cups in advance?
-
Yes, prepare the chocolate cups up to 2 days ahead and store in an airtight container at room temperature. Keep them in a cool, dry place away from direct sunlight to prevent melting.
- → What type of chocolate works best for the cups?
-
Dark chocolate with at least 60% cocoa content creates the most stable cups with rich flavor. The higher cocoa content helps the cups set properly and provides a nice contrast to the sweet mousse filling.
- → Can I use different toppings?
-
Absolutely! Customize with seasonal fruits, crushed cookies, shredded coconut, caramel sauce, or chopped candy pieces. The toppings can be adjusted to match any occasion or personal preference.
- → How do I prevent the chocolate cups from cracking?
-
Ensure the chocolate is properly tempered and apply thick, even layers when coating the liners. Chill thoroughly before attempting to remove the liners, and handle gently when peeling them away.
- → Can I make these without cupcake liners?
-
Silicone molds work beautifully and are reusable. You could also use small plastic cups as molds, but paper cupcake liners provide the easiest release and are typically the most reliable method.
- → How long will the assembled cups keep?
-
For best texture and flavor, serve within 24 hours of assembly. The mousse may start to weep or lose its airy texture if refrigerated longer. The chocolate cups alone can be stored for several days.
