 Pin to board
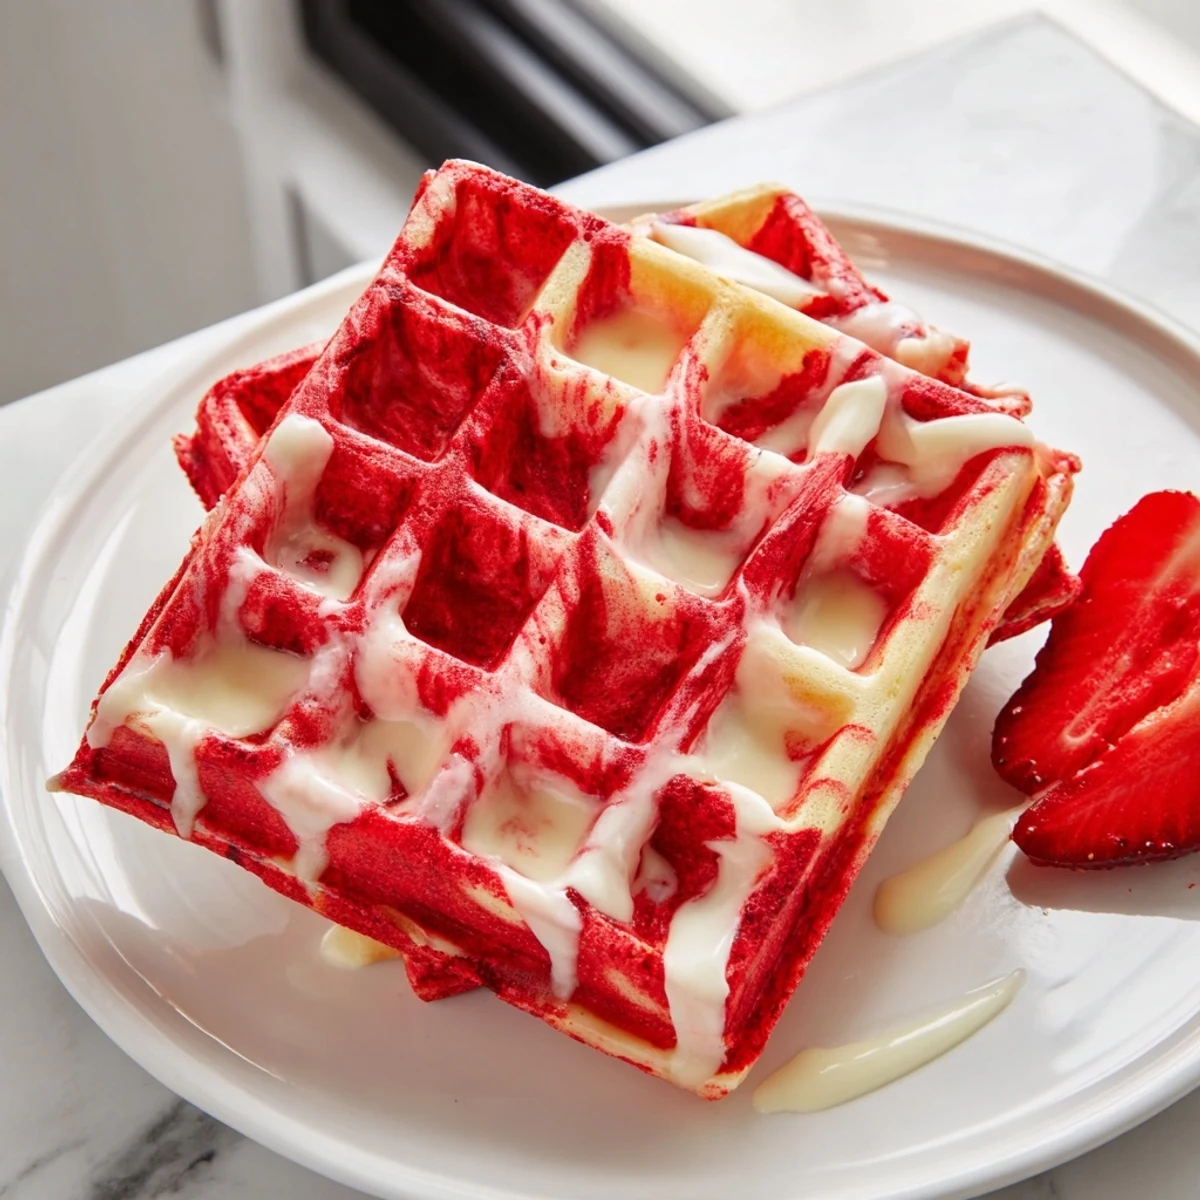
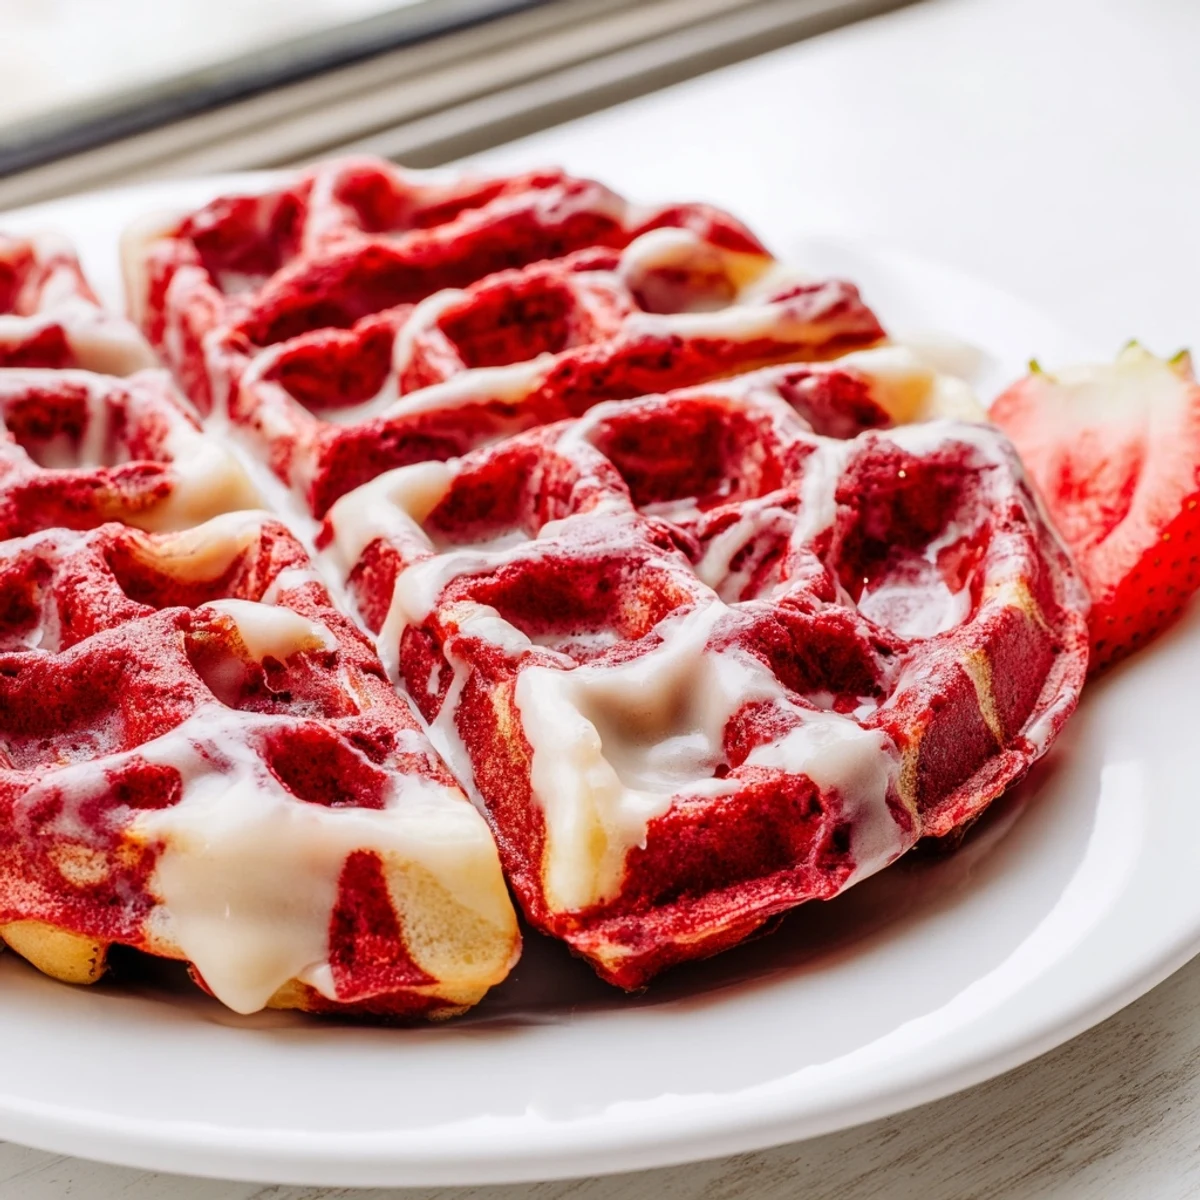
 These stunning red velvet marble waffles combine classic vanilla batter with a vibrant cocoa-red swirl for a beautiful presentation. The crisp exterior and tender interior make them ideal for leisurely weekend brunches or special morning celebrations.
Creating the marble effect is simple: prepare two batters, then spoon alternating dollops onto your hot waffle iron and gently swirl. The result features eye-catching red streaks against golden vanilla, delivering both visual appeal and the signature chocolate-vanilla flavor combination.
Ready in just 30 minutes with basic pantry ingredients, these waffles crown any breakfast table. Top with cream cheese glaze, maple syrup, or fresh berries for an extra indulgent touch that transforms ordinary mornings into something memorable.
Last Sunday morning, my youngest walked into the kitchen while I was making regular waffles and asked why we couldn't have something that looked like a birthday cake for breakfast. That innocent question sparked an entire weekend of experimenting with batters and swirls until we hit on this marble technique that's become our new family favorite.
My kitchen smelled like a bakery the first time I pulled these from the waffle iron, and honestly, my kids stood on stools watching the red and vanilla batters swirl together like they were witnessing magic. Now they request them whenever friends sleep over, and I've learned to double the batch because somehow they vanish faster than regular waffles ever did.
Ingredients
- 2 cups all-purpose flour: The foundation that gives these waffles their structure and crispy exterior
- 2 tbsp granulated sugar: Just enough sweetness to balance the tangy buttermilk without making them dessert-like
- 2 tsp baking powder and 1/2 tsp baking soda: This combination creates the fluffy lift while the soda reacts with buttermilk for extra tenderness
- 1 3/4 cups buttermilk: Essential for that classic red velvet tang and tender crumb; room temperature mixes best
- 2 large eggs: Room temperature eggs incorporate more easily into the batter for consistent texture
- 4 tbsp unsalted butter, melted: Adds richness and helps create those crispy edges everyone loves
- 1 tsp vanilla extract: Pure vanilla makes the vanilla portion of the marble shine against the chocolate
- 2 tbsp unsweetened cocoa powder: Just enough cocoa to give the red velvet its characteristic depth without overwhelming the vanilla
- 1 tbsp red food coloring: Gel coloring creates a deeper red without thinning your batter like liquid can
Instructions
- Mix the dry base:
- Whisk flour, sugar, baking powder, baking soda, and salt in a large bowl until everything is evenly distributed
- Combine wet ingredients:
- In a separate bowl, whisk buttermilk, eggs, melted butter, and vanilla until completely smooth and incorporated
- Make the base batter:
- Gently fold the wet mixture into the dry ingredients just until combined; some small lumps are perfectly fine and prevent overmixing
- Create the two-tone effect:
- Divide batter evenly between two bowls; stir cocoa powder and red food coloring into one bowl until well blended and leave the other plain
- Prepare your waffle iron:
- Preheat according to manufacturer instructions and lightly grease with oil or nonstick spray to ensure easy release
- Swirl and cook:
- Dollop alternating spoonfuls of both batters onto the hot iron; gently swirl with a chopstick or butter knife for that beautiful marble pattern, then cook 3 to 5 minutes until golden and crisp
 Pin to board
 These became a Christmas morning tradition at our house after the year I made them on a whim and my brother-in-law asked if I could ship him some. Now I keep red food coloring in the pantry year-round just in case someone needs a little extra cheer with their breakfast.
Getting The Perfect Marble
The key is not overthinking the swirl pattern; I used to try to create elaborate designs, but simple back-and-forth motions with just one or two passes through both batters create the most beautiful, natural-looking results.
Cream Cheese Glaze Magic
While maple syrup is classic, a quick cream cheese drizzle transforms these into something truly special. Mix room temperature cream cheese with a splash of milk and powdered sugar until it reaches a pourable consistency.
Make Ahead Tips
The batter can be prepared the night before and stored in separate containers; the red velvet portion might deepen slightly in color overnight. In the morning, give each bowl a gentle stir before swirling and cooking.
- Freeze cooked waffles in a single layer then transfer to a freezer bag for quick weekday breakfasts
- Reheat frozen waffles in a toaster to restore their crispy exterior without drying them out
- The cream cheese glaze can be made ahead and stored in the refrigerator for up to a week
 Pin to board
 There's something joyful about cutting into a waffle that looks like a work of art, and watching guests discover the surprise inside never gets old.
Recipe FAQs
- → How do I achieve the marble effect?
-
Divide your batter into two portions. Leave one vanilla and mix cocoa powder plus red food coloring into the second. When cooking, drop alternating spoonfuls of both batters onto the waffle iron, then use a chopstick or knife to gently swirl them together before closing the lid.
- → Can I make these waffles ahead of time?
-
Yes, cook the waffles completely and let them cool. Store in an airtight container in the refrigerator for up to 3 days or freeze for up to 2 months. Reheat in a toaster or oven at 350°F until warmed through and crisp.
- → What can I use instead of buttermilk?
-
Greek yogurt thinned with a splash of milk makes an excellent substitute. Alternatively, create a buttermilk alternative by adding 1 tablespoon of vinegar or lemon juice to regular milk and letting it sit for 5 minutes before using.
- → Is liquid or gel food coloring better?
-
Gel food coloring typically produces more vibrant red tones with less liquid, which won't affect your batter consistency. However, liquid coloring works perfectly fine—just be mindful that adding too much liquid may slightly thin your batter.
- → What toppings work best with red velvet marble waffles?
-
Cream cheese glaze complements the red velvet flavors beautifully, balancing the subtle cocoa notes. Maple syrup, fresh berries, whipped cream, or even a dusting of powdered sugar all make excellent toppings that enhance rather than overpower the marbled presentation.
