 Pin to board
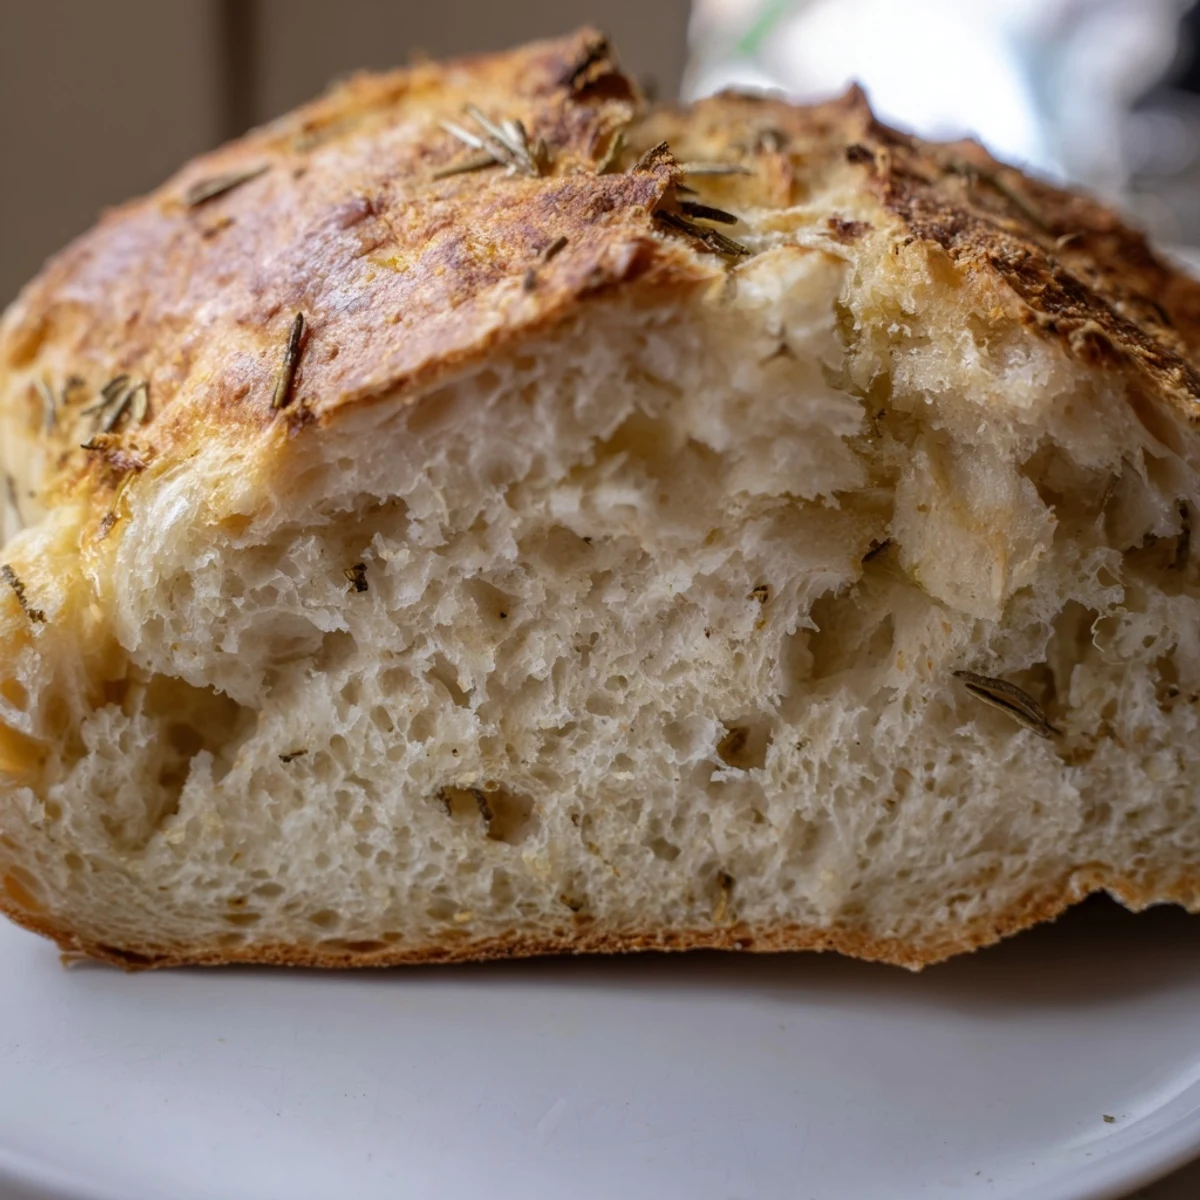
 This rustic European-style loaf combines the aromatic warmth of fresh garlic and rosemary with the satisfying crunch of a perfectly baked crust. The Dutch oven method creates an ideal steam environment, producing that professional bakery-quality texture at home.
The dough comes together with just five staple ingredients, requiring minimal hands-on time. After a simple rise period, the bread bakes at high heat, first covered to trap steam and develop structure, then uncovered to achieve that signature deep golden crust.
Perfect alongside hearty soups, for dipping in olive oil, or sliced thick for gourmet sandwiches. The vegetarian loaf yields eight generous servings and adapts well to additions like Kalamata olives or sun-dried tomatoes.
The entire house filled with this incredible roasted garlic aroma that had my partner poking their head into the kitchen every fifteen minutes asking if it was done yet. I actually doubled the garlic that first time because I couldn't imagine too much being possible, and I was absolutely right.
My neighbor came knocking with a bottle of wine exactly when I was pulling this bread out of the oven, and we ended up standing in my kitchen breaking off warm pieces with our bare hands. She still asks me to make it whenever she comes over, and honestly I don't mind because it makes the whole apartment smell amazing.
Ingredients
- Bread flour: The higher protein content creates that beautiful chewy structure and helps the bread develop those gorgeous air pockets inside
- Fine sea salt: Enhances all the flavors and helps strengthen the gluten network for better texture
- Active dry yeast: This tiny amount works magic over those long hours, creating deep flavor through slow fermentation
- Lukewarm water: Should feel like bath temperature,激活 the yeast without killing it
- Olive oil: Adds subtle richness and keeps the crumb tender
- Fresh garlic: Minced right into the dough so every bite carries that mellow roasted flavor
- Fresh rosemary: Finely chopped releases its oils throughout the dough for aromatic pockets in every slice
- Extra flour or cornmeal: Prevents sticking and adds a professional bakery finish to the bottom crust
Instructions
- Mix your base:
- Whisk together the flour, salt, and yeast in a large bowl until everything looks evenly combined.
- Build the dough:
- Stir in the lukewarm water and olive oil until a shaggy, sticky dough comes together.
- Add the magic:
- Fold in the minced garlic and chopped rosemary, mixing gently until distributed throughout.
- First rise:
- Cover the bowl and let it rest at room temperature for 2 to 3 hours until the dough has doubled in size.
- Shape the loaf:
- Turn the dough onto a floured surface and gently shape into a ball using floured hands.
- Second rise:
- Place the dough seam side down on parchment paper, cover loosely, and let rise for another 30 to 45 minutes.
- Preheat strategically:
- Put your Dutch oven with its lid in the oven and heat to 450°F for at least 30 minutes.
- Bake covered:
- Carefully transfer the dough with parchment into the hot Dutch oven, cover, and bake for 30 minutes.
- Finish with a golden crust:
- Remove the lid and bake for another 12 to 15 minutes until deep golden brown.
- Cool completely:
- Let the bread rest on a rack for at least 20 minutes before slicing into it.
 Pin to board
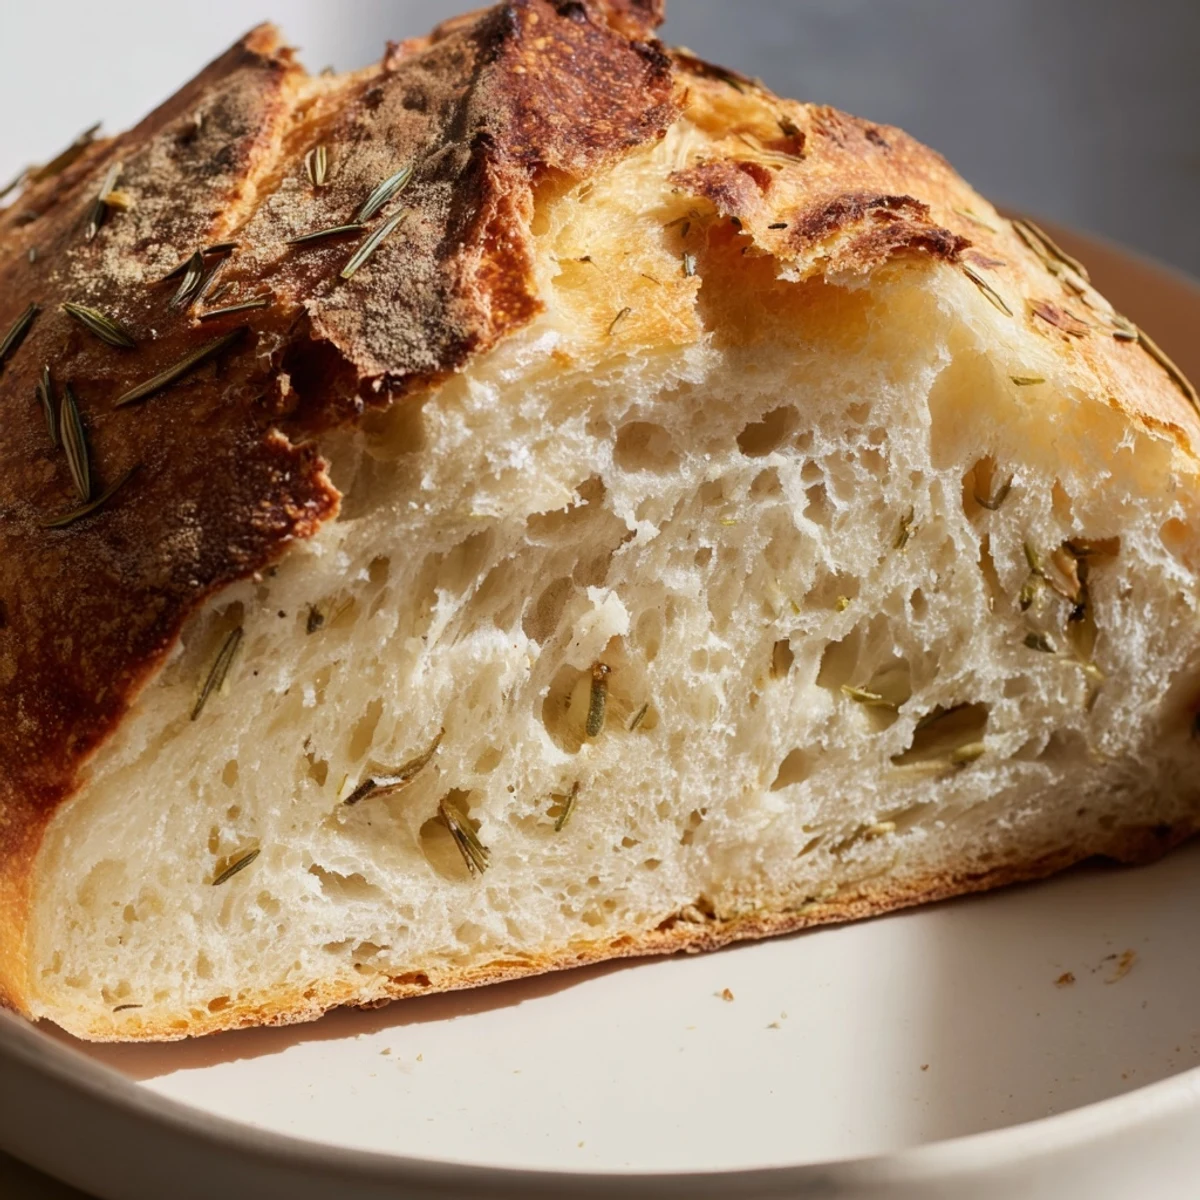
 This bread became my go to for dinner parties because people genuinely cannot believe it came out of my home kitchen. Something about pulling a warm loaf apart at the table just makes people happier.
Making It Your Own
I have experimented with adding kalamata olives or sun dried tomatoes directly into the dough, and honestly both variations are spectacular. The salty brine from olives cuts through the richness while tomatoes add sweet concentrated bursts.
Getting The Timing Right
Start this in the morning if you want fresh bread with dinner, or begin the night before and let that first rise happen in the refrigerator for even more complex flavor development. Cold dough also handles easier during shaping.
Storage Secrets
This bread is absolutely best the day it is made when that crust is at its peak crunch, but leftovers still make phenomenal toast the next morning.
- Store cut side down on a cutting board, never in plastic which turns the crust soggy
- Revive day old bread in a 350°F oven for 5 to 10 minutes to recrisp the exterior
- Freeze whole slices in a freezer bag for up to a month and toast straight from frozen
 Pin to board
 There is something deeply satisfying about pulling a perfectly golden loaf from a Dutch oven, hearing that crackle of the cooling crust, and knowing you made that magic happen.
Recipe FAQs
- → Why bake bread in a Dutch oven?
-
The Dutch oven traps steam during baking, creating a professional-quality crust. The enclosed environment allows the bread to rise fully while developing a crispy, golden exterior and soft, airy interior that mimics commercial bakery ovens.
- → Can I use dried rosemary instead of fresh?
-
Yes, substitute 2 teaspoons of dried rosemary for the fresh version. Dried herbs are more concentrated, so use roughly one-third the amount. Add them directly to the dry ingredients to ensure even distribution throughout the dough.
- → How do I know when the bread is done baking?
-
The crust should be deep golden brown, and the loaf should sound hollow when tapped on the bottom. An instant-read thermometer inserted into the center should read between 200-205°F (93-96°C). Let it cool at least 20 minutes before slicing.
- → Can I make this dairy-free?
-
This loaf is naturally dairy-free as written, containing no milk, butter, or cheese. The olive oil provides richness and moisture without dairy. Always verify your bread flour and other ingredients are produced in a facility that meets your dietary needs.
- → What's the best way to store leftovers?
-
Wrap the cooled loaf tightly in plastic or store in a sealed bag at room temperature for up to two days. For longer storage, slice and freeze in a freezer bag. Frozen slices thaw quickly and make excellent toast when reheated in a toaster or oven.
- → Can I reduce the rising time?
-
While you can speed rising by placing the dough in a warm (85°F/29°C) spot, slower rising develops better flavor. The 2-3 hour initial rise at room temperature allows proper fermentation. Rushing this step may result in dense bread with less complex taste.
