 Pin to board
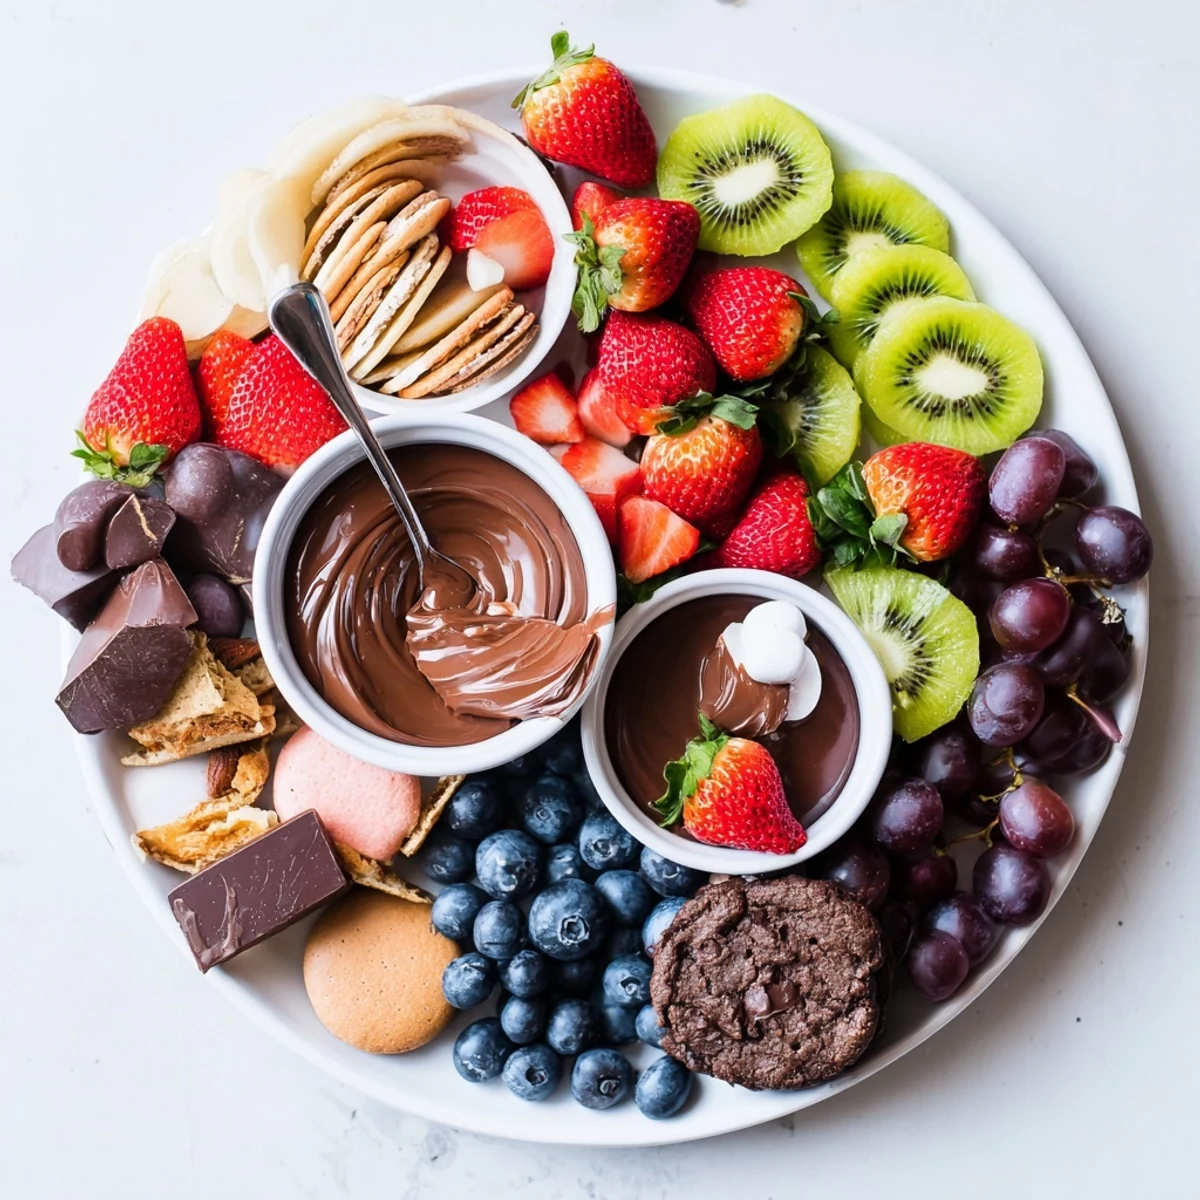
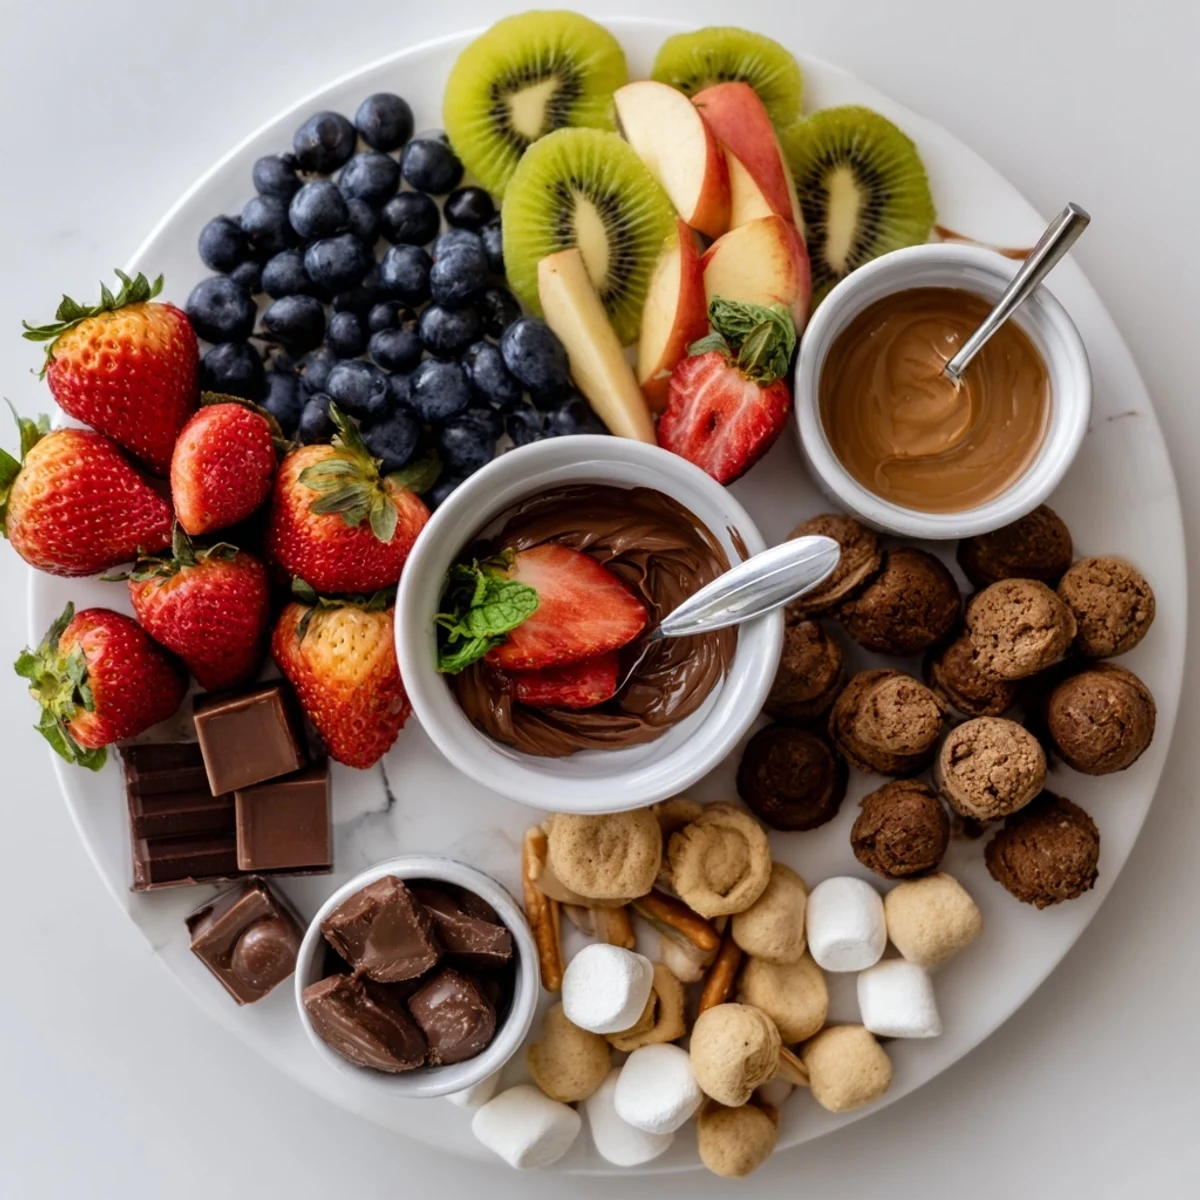
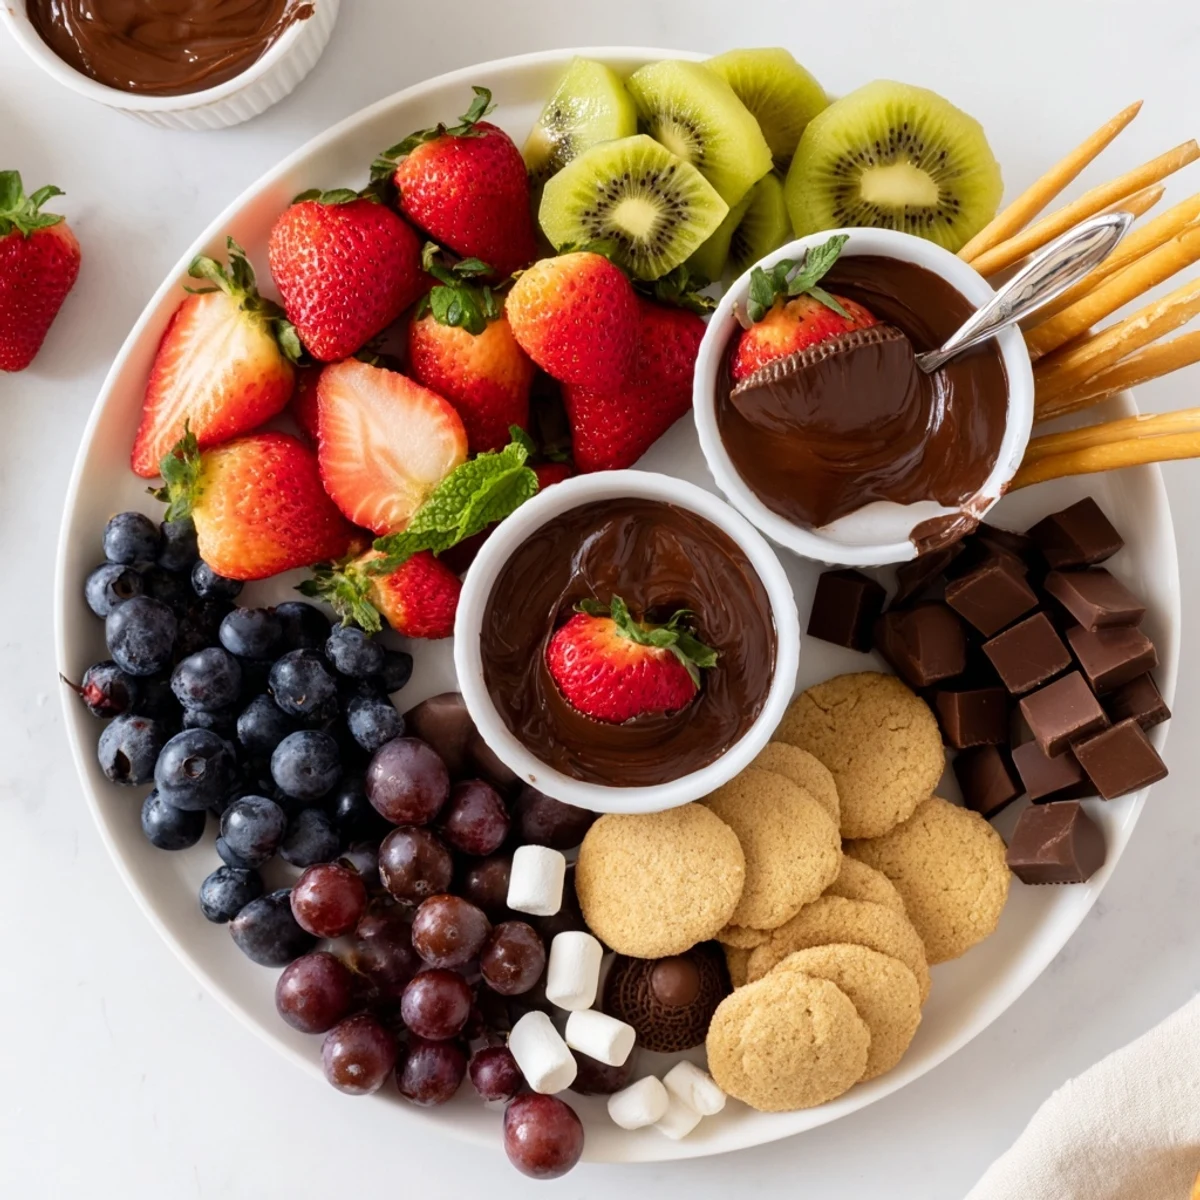
 Assemble a showstopping dessert charcuterie board in about 20 minutes using fresh fruit, assorted chocolates, cookies, brownie bites and small bowls of Nutella, salted caramel and whipped cream. Arrange items in distinct sections, tuck garnishes into gaps, and vary heights and textures for visual appeal. Serve with tongs and small spoons, and swap in seasonal fruits or gluten-free sweets to suit guests.
My friend Sarah called at noon on New Years Eve in a panic because she had thirty people coming over and nothing sweet to serve. I told her to stop worrying, grabbed every random treat from my pantry, and built what she later called the best dessert spread shed ever seen. That chaotic afternoon taught me that a dessert charcuterie board is less about precision and more about abundance arranged with a little love. Twenty minutes later, her guests were hovering around the table like moths around a flame.
I have made boards for baby showers, birthday parties, and one memorable Tuesday when I decided a random weeknight deserved something festive. My niece once told me that the marshmallows taste better when they are piled next to the strawberries, and honestly, she might be right. There is something magical about watching people graze, discover combinations, and argue playfully over the last brownie bite.
Ingredients
- 1 cup strawberries, halved: Look for berries that are red all the way to the tip because those have the most natural sweetness.
- 1 cup seedless grapes: Red and green mixed together add beautiful color contrast on the board.
- 1 cup blueberries: These little gems fill in gaps perfectly and require zero prep work.
- 2 kiwis, peeled and sliced: Slice them into rounds rather than chunks for a more elegant presentation.
- 1 apple, thinly sliced: Toss immediately with lemon juice so your beautiful slices do not turn brown before guests arrive.
- 1 cup assorted chocolates: A mix of dark, milk, and white gives people choices and looks stunning when scattered.
- 1 cup assorted cookies: Shortbread, chocolate chip, and macarons each bring a different texture to the table.
- 1/2 cup mini brownies: Fudgy bites are essential because every board needs something rich and indulgent.
- 1/2 cup marshmallows: They look like little clouds tucked between the fruit and chocolates.
- 1/2 cup chocolate covered pretzels: That salty sweet crunch keeps people coming back for more.
- 1/2 cup Nutella: Scooped into a small bowl, it becomes the most popular dip on the entire board.
- 1/2 cup salted caramel sauce: The salt balances all the sugar and makes everything taste more complex.
- 1/2 cup whipped cream: Keep it chilled until the last possible moment so it holds its shape.
- 1/4 cup candied nuts: These add a satisfying crunch that breaks up all the soft textures.
- Fresh mint sprigs: Purely optional but they make the whole board look polished and intentional.
Instructions
- Prep your fruit with care:
- Wash every piece under cold running water and pat everything completely dry with a clean towel. Wet fruit makes chocolates sticky and causes the board to look messy fast.
- Build your foundation:
- Arrange the larger fruits like strawberries and kiwi slices in clusters around the edges of your board, leaving space for bowls in the center. Think of it as painting with food, letting each color have its own moment.
- Set out your dips:
- Fill three small bowls with Nutella, salted caramel, and whipped cream, then nestle them into different areas of the board so no one has to reach too far. Spacing them out creates natural gathering spots.
- Scatter the sweets:
- Group chocolates, cookies, brownies, marshmallows, and pretzels in small piles next to the fruit sections, keeping similar items together but not rigidly separated. Let it feel generous and abundant rather than orderly.
- Fill every little gap:
- Tuck candied nuts into empty spaces and lay mint sprigs here and there for pops of green. The goal is a board that looks overflowing with treats, with no bare patches visible.
- Let everyone dig in:
- Set out small plates, tongs, and napkins, then step back and watch your guests create their own perfect bite combinations. Encourage them to dip a strawberry in caramel or press a marshmallow into the Nutella.
 Pin to board
 The night my neighbor quietly admitted she had never tried Nutella on a pretzel, I handed her one without a word and watched her eyes go wide. She now makes her own dessert board every holiday season and always texts me a photo.
Choosing the Right Board
Any flat surface works, from a wooden cutting board to a large ceramic platter to a sheet pan lined with parchment paper. I once used an upside down baking sheet when my serving board was not big enough, and nobody noticed or cared. The key is having enough space to spread things out so nothing looks crowded.
Making It Your Own
Seasonal fruit swaps keep this board interesting all year long, like stone fruits in summer and persimmons in winter. Holiday themed candies or shaped cookies add instant festivity without extra effort. The best boards reflect whatever you genuinely love eating.
Serving and Storing Leftovers
Cover any leftover fruit and treats separately so cookies stay crisp and fruit does not leak moisture into everything else. Most components keep well for two days in the refrigerator, though the whipped cream will need a quick fresh whip before serving again.
- Assemble no more than thirty minutes before your guests arrive for the freshest presentation.
- Keep extra treats in the kitchen to refill as the board gets picked over.
- Always label dips if any guests have allergies they might not mention upfront.
 Pin to board
 A dessert charcuterie board is really just an invitation to play with your food, and the best ones are made with whatever makes you happy. Set it out, pour some coffee or wine, and let the evening unfold.
Recipe FAQs
- → How should I store leftovers?
-
Cover individual sections loosely with plastic wrap and refrigerate. Fresh fruit will last best when separated from wet dips; consume within 24 hours for optimal texture.
- → What are good swap options for allergens?
-
Substitute nut-based spreads with sunbutter or seed butter, choose gluten-free cookies and brownie bites, and use dairy-free whipped topping to reduce common allergens.
- → How do I prevent sliced fruit from browning?
-
Toss apple and pear slices in a little lemon juice or arrange them later during service. Keep prepped fruit chilled and dry until assembly.
- → How can I make the board visually appealing?
-
Group like items, alternate colors, vary shapes and heights, and fill gaps with candied nuts or mint sprigs. Use small bowls for dips to add structure.
- → What dips and spreads work best?
-
Thick spreads like Nutella, salted caramel and whipped cream or vanilla yogurt hold up well. Place them in shallow bowls for easy dipping and pairing.
- → Any tips for transporting the board?
-
Assemble loosely at the venue if possible. If you must transport, secure items with cling film and pack small bowls separately to avoid spills.
