 Pin to board
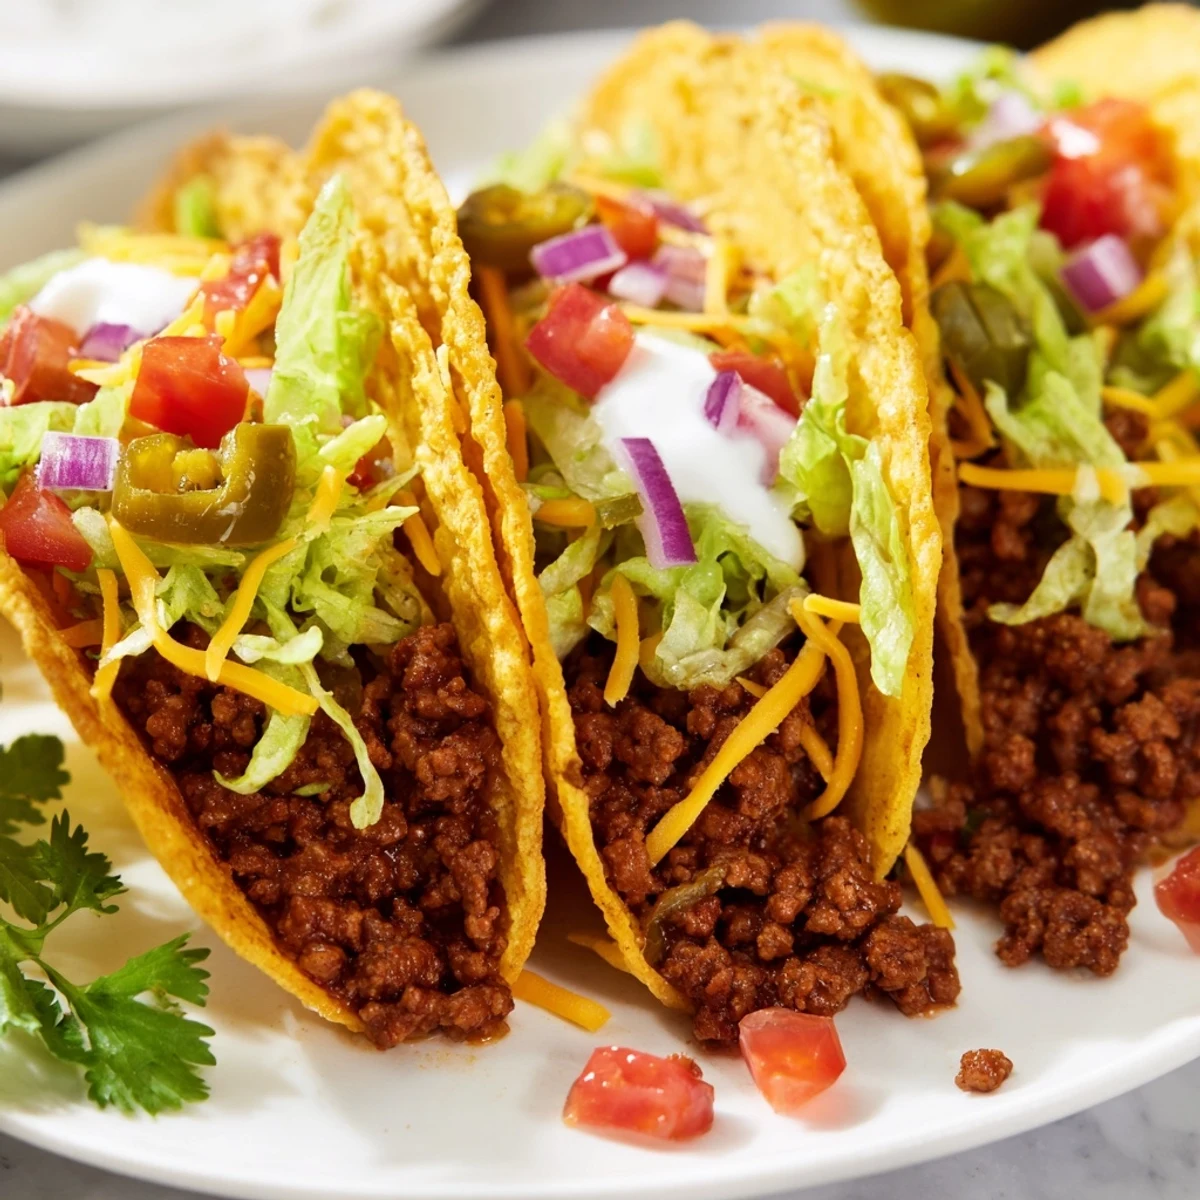
 These crispy beef tacos bring together everything you love about Mexican-inspired cooking in one satisfying bite. Seasoned ground beef simmers with chili powder, cumin, and smoked paprika until deeply flavorful, then gets tucked into golden-fried tortilla shells that shatter with every crunch.
Top them with shredded lettuce, diced tomatoes, jalapeños, and a dollop of sour cream for a complete meal that comes together in just 40 minutes. Perfect for busy weeknights or casual gatherings with friends.
The sizzle of beef hitting a hot pan on a Tuesday evening is one of those sounds that instantly signals something good is about to happen in my kitchen. I stumbled into making crispy beef tacos during a week when the fridge was bare except for ground beef, tortillas, and the usual seasoning suspects. What started as a desperate pantry raid turned into the meal my roommate requested every single week after that. There is something deeply satisfying about frying your own taco shells, watching them puff and crisp in the oil, that makes the whole thing feel like a small celebration rather than just dinner.
I served these at an impromptu gathering once when friends showed up unannounced with a six pack and empty stomachs. Within ten minutes the kitchen smelled like a taqueria, and people were hovering over the stove waiting for the next batch of shells to come out of the oil.
Ingredients
- 500 g (1 lb) ground beef: Use 80/20 for the best balance of flavor and juiciness, leaner meat tends to dry out in the filling.
- 1 small onion, finely chopped: A yellow onion cooks down sweet and soft, creating an aromatic base for the spices.
- 2 cloves garlic, minced: Fresh garlic makes a noticeable difference here, do not reach for the jarred kind.
- 1 tbsp chili powder: This is the backbone of the seasoning blend and provides warmth without overwhelming heat.
- 1 tsp ground cumin: Cumin gives that unmistakable taco shop aroma everyone associates with great Mexican food.
- 1/2 tsp smoked paprika: Adds a subtle smokiness that deepens the whole flavor profile beautifully.
- 1/2 tsp dried oregano: Mexican oregano is ideal if you have it, but regular works fine too.
- 1/4 tsp cayenne pepper (optional): Leave it out for sensitive palates, or double it if you like a serious kick.
- 1/2 tsp salt: Adjust after the broth reduces, some stocks are saltier than others.
- 1/4 tsp black pepper: Freshly cracked always gives better flavor than pre ground.
- 2 tbsp tomato paste: This concentrates the savory notes and helps the filling cling to the shells.
- 120 ml (1/2 cup) beef broth or water: Broth adds richness, but water works in a pinch since the spices carry plenty of flavor.
- 1 tbsp vegetable oil: For sauteing the aromatics and beef, any neutral oil does the job.
- 12 corn or flour tortillas (15 cm / 6 inch): Corn tortillas fry up crispier, flour tortillas stay slightly chewy inside.
- Vegetable oil for frying: You need about 2 cm depth in your pan for proper shallow frying.
- 150 g (1 1/2 cups) shredded cheddar or Monterey Jack cheese: Jack melts creamier, cheddar brings sharper flavor, or mix both.
- Optional toppings: Shredded lettuce, diced tomato, sliced jalapenos, diced red onion, sour cream, fresh cilantro, lime wedges, and salsa all belong on the table so everyone can build their own masterpiece.
Instructions
- Build the aromatic base:
- Heat one tablespoon of vegetable oil in a large skillet over medium heat until it shimmers, then add the chopped onion and cook for about three minutes until it softens and turns translucent. Add the minced garlic and stir for one minute until your kitchen smells incredible.
- Brown the beef:
- Add the ground beef to the skillet and break it apart with a wooden spoon as it cooks, continuing for about seven minutes until no pink remains and the meat is evenly browned. Drain excess fat if needed, though a little left behind adds flavor.
- Bloom the spices:
- Stir in the chili powder, cumin, smoked paprika, oregano, cayenne, salt, and black pepper all at once and let them toast in the hot fat for one full minute. The spices will become deeply fragrant and slightly darken in color.
- Create the saucy filling:
- Add the tomato paste and stir until it coats every bit of the beef, then pour in the broth and let the mixture simmer for three to four minutes. You want most of the liquid absorbed so the filling is saucy but not wet enough to sog out your shells.
- Fry the taco shells:
- Pour about two centimeters of oil into a deep skillet and heat over medium high, then use tongs to lay a tortilla in the oil and immediately fold it in half, holding the shape for a few seconds as it crisps. Fry each side for one to two minutes until golden and crunchy, then drain on paper towels.
- Fill and cheese:
- Spoon the warm beef filling into each crispy shell while both are still hot, then sprinkle generously with shredded cheese so it melts into every crevice. Work quickly so the cheese gets gooey before the shells cool.
- Dress and serve:
- Set out all your toppings and let everyone customize their own tacos, squeezing lime wedges over the top as the finishing touch. Serve immediately while the shells are at peak crunch.
 Pin to board
 The night I realized these tacos had become a tradition was when my friend Miguel brought over a bottle of hot sauce he had been saving specifically for taco night at my place.
Making It Your Own
Ground turkey swaps in seamlessly for a lighter version, and plant based crumbles work surprisingly well if you season them just as aggressively. The spice blend is forgiving, so adjust ratios based on what your pantry holds and what your crowd prefers.
What to Serve Alongside
A chilled Mexican lager or a tart margarita is the obvious pairing, but a simple glass of horchata balances the heat beautifully if spices run high. Rice and beans on the side turn this from a snack into a proper feast without much extra effort.
Storage and Reheating Wisdom
The beef filling stores beautifully in the refrigerator for up to four days and actually tastes better on day two when the flavors have settled. Fried shells lose their crunch quickly, so always store them separately from the filling and reheat in a dry skillet rather than the microwave.
- Keep leftover shells in a paper bag at room temperature to preserve their crunch.
- Freeze extra filling in flat portions so it thaws fast on busy weeknights.
- Never assemble tacos ahead of time unless soggy shells are something you enjoy.
 Pin to board
 Some meals are just dinner, and some meals become the thing people remember and ask for by name, and these crispy beef tacos have earned that spot in my rotation.
Recipe FAQs
- → Can I use store-bought taco shells instead of frying my own?
-
Yes, store-bought crispy taco shells work perfectly fine and save time. Simply warm them according to package directions before filling with the beef mixture.
- → What type of tortillas work best for frying?
-
Corn tortillas hold their shape well and crisp up beautifully when fried. Flour tortillas also work but yield a slightly different texture. For the crispiest results, use fresh corn tortillas that haven't been refrigerated.
- → Can I make the beef filling ahead of time?
-
Absolutely. The seasoned beef filling can be prepared up to 3 days in advance and stored in an airtight container in the refrigerator. Reheat it in a skillet over medium heat before assembling your tacos.
- → How do I keep the fried shells crispy?
-
Drain the fried shells on paper towels immediately after cooking and keep them in a warm oven at around 100°C (200°F) until ready to fill. Avoid stacking them on top of each other, as trapped steam causes sogginess.
- → What can I substitute for ground beef?
-
Ground turkey, chicken, or plant-based mince all work well as substitutions. Adjust the seasoning slightly and cook until fully browned through. For a vegetarian version, try crumbled tofu or black beans seasoned with the same spice blend.
- → Are these tacos gluten-free?
-
They can be gluten-free if you use certified gluten-free corn tortillas. Check the packaging to be sure, as some brands process corn tortillas in facilities that also handle wheat. Also verify that your beef broth is gluten-free.
