 Pin to board
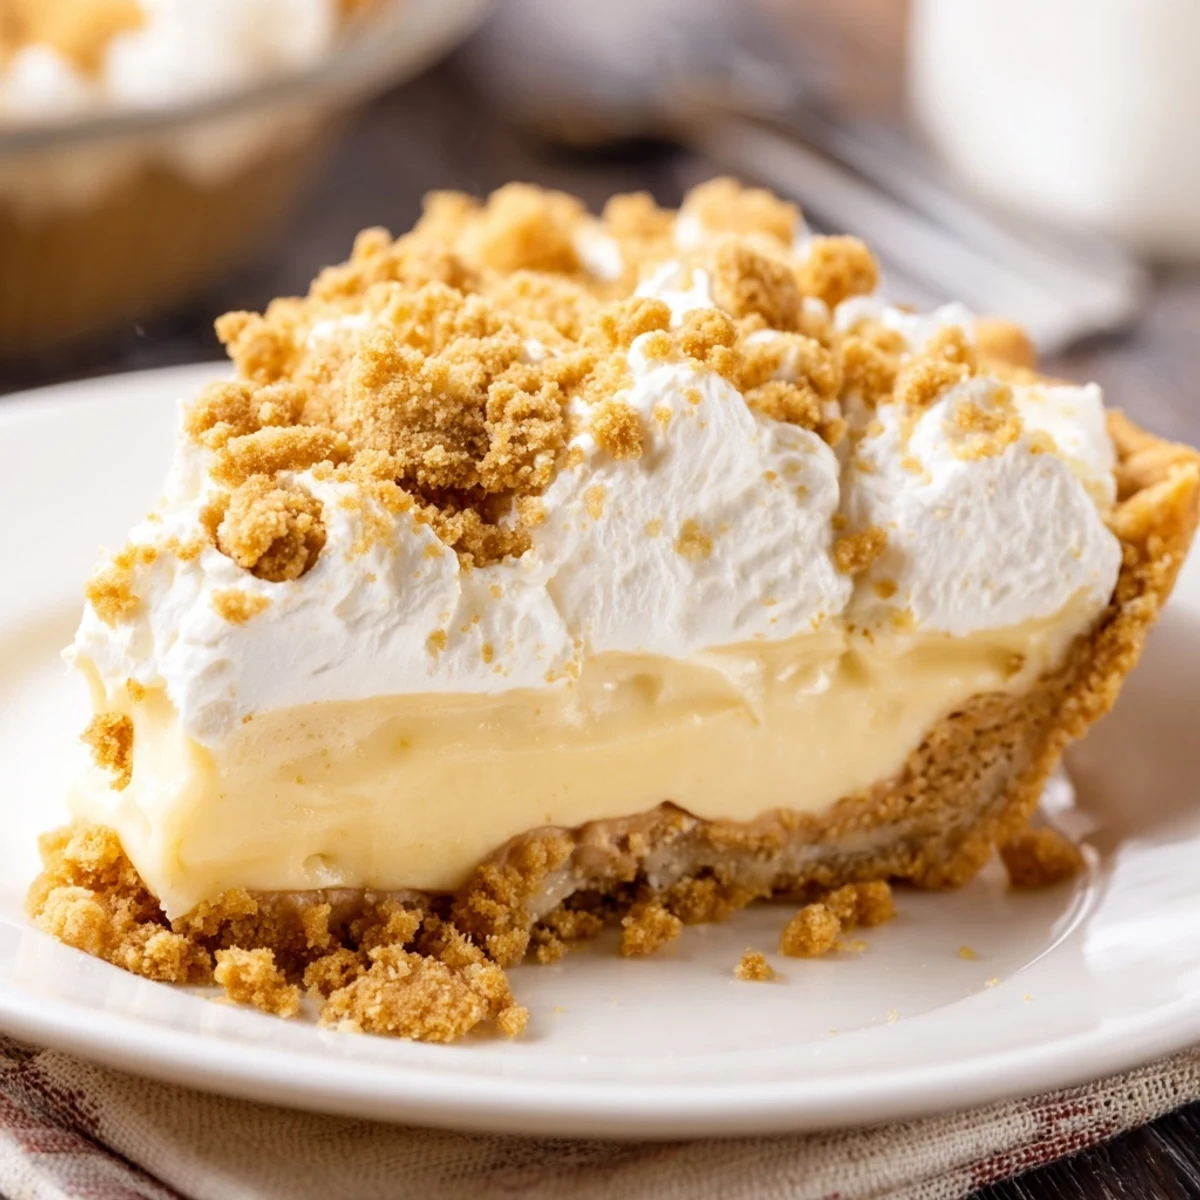
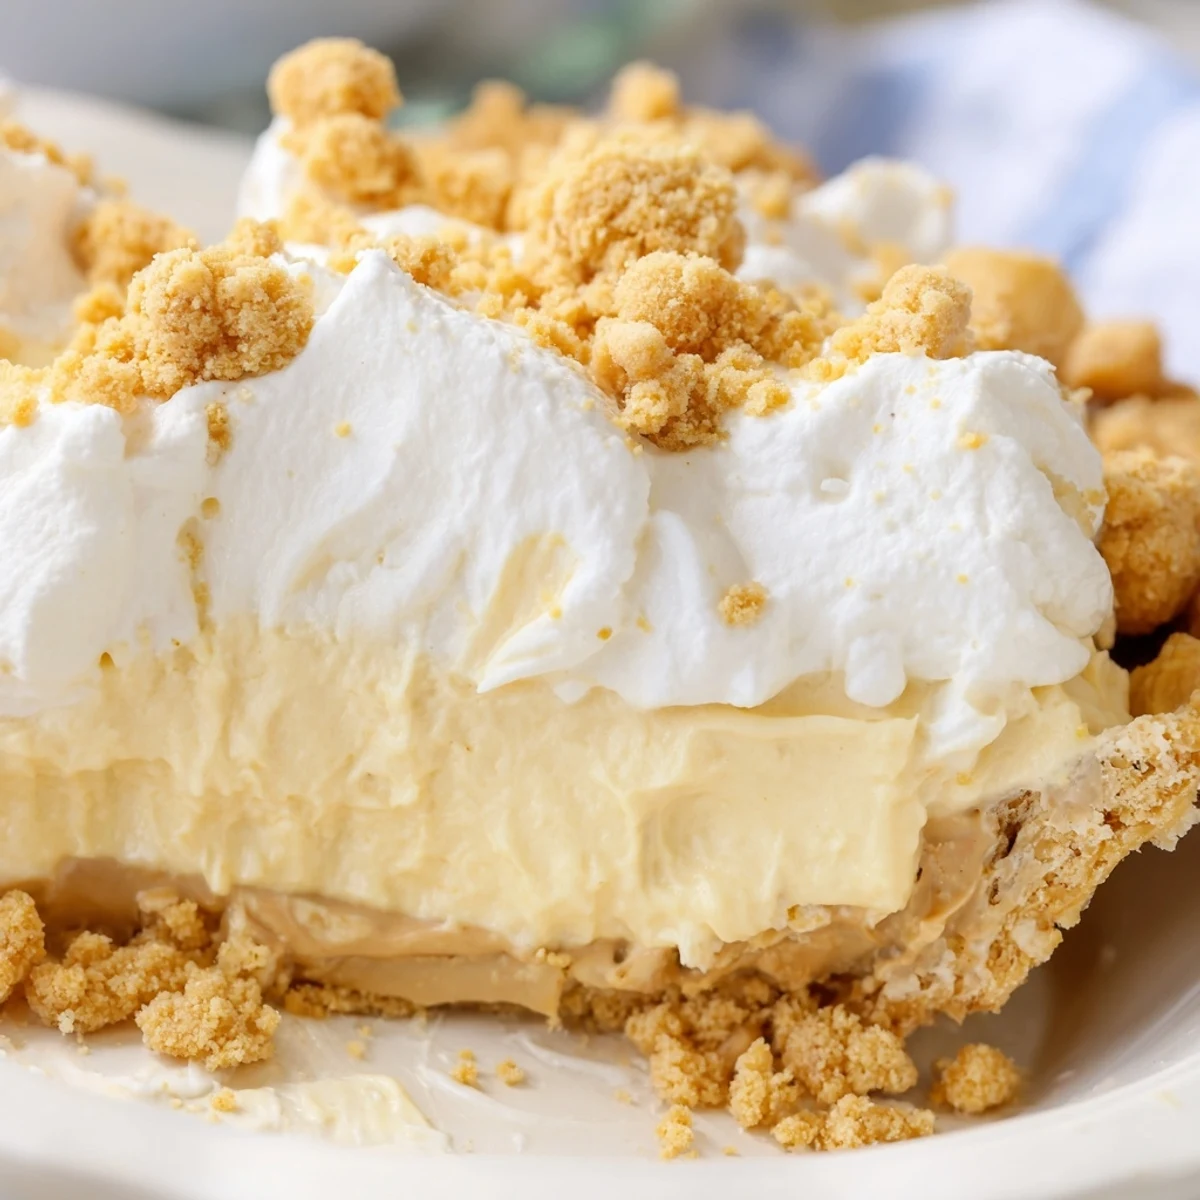
 This old-fashioned Amish peanut butter dream pie delivers pure comfort with its luscious, creamy texture and rich peanut butter flavor. The velvety filling rests on a layer of sweet peanut butter crumbs, all nestled in a crisp pie shell and topped with freshly whipped cream. Perfect for gatherings, this nostalgic dessert comes together easily and chills to perfection. The combination of creamy custard-like filling with crumbly peanut butter bits creates an irresistible texture that's both indulgent and satisfying.
The first time I encountered this pie at an Amish bakery in Lancaster County, I actually laughed out loud. Peanut butter crumbs layered throughout a creamy custard filling seemed almost too indulgent to be real. One forkful later and I was completely converted to the brilliance of this simple combination. It is now the most requested dessert at every family gathering.
Last summer my neighbor asked me to bring dessert for her daughters graduation party. I made two of these pies and watched them disappear within twenty minutes. Three different guests asked for the recipe before they even finished their first slice.
Ingredients
- 1 9-inch prepared pie crust: Having this baked and cooled ahead of time makes the whole process feel effortless and stress free
- 3/4 cup creamy peanut butter: Room temperature peanut butter mixes so much better into the powdered sugar
- 1 cup powdered sugar: This transforms the peanut butter into the most wonderful crumbly texture throughout the pie
- 2/3 cup granulated sugar: The sweetness perfectly balances the rich peanut butter flavor
- 1/3 cup all-purpose flour: This little bit of flour is what makes the custard properly thicken into a silky filling
- 1/4 teaspoon salt: Do not skip this as it makes all the peanut butter flavors pop beautifully
- 2 cups whole milk: The higher fat content creates that luxurious restaurant style texture
- 3 large egg yolks: Room temperature yolks incorporate more smoothly into the hot custard base
- 1 teaspoon pure vanilla extract: Real vanilla makes such a difference in this simple pie
- 2 tablespoons unsalted butter: This adds an extra layer of richness to the finished filling
- 1 cup heavy whipping cream: Cold cream whips up faster and holds its shape better on the pie
- 2 tablespoons powdered sugar: Just enough sweetness to complement the rich peanut butter filling
- 1/2 teaspoon vanilla extract: A touch of vanilla in the whipped cream ties everything together
Instructions
- Make the magic crumbs:
- Mix the peanut butter and powdered sugar with a fork until it forms delicious crumbles throughout your bowl
- Layer the bottom:
- Spread half of those amazing crumbs into the bottom of your cooled pie crust
- Start the custard base:
- Whisk together the granulated sugar flour and salt in your saucepan then gradually whisk in the milk until everything is perfectly smooth
- Cook until thickened:
- Place over medium heat and whisk constantly until the mixture just begins to bubble and coats the back of your spoon nicely
- Temper those egg yolks:
- Whisk your yolks in a separate bowl then slowly add a bit of the hot milk mixture while whisking constantly
- Combine and finish cooking:
- Pour the warmed egg mixture back into the saucepan and cook for two more minutes until beautifully thick and glossy
- Add the finishing touches:
- Remove from heat and stir in the butter and vanilla until completely smooth and wonderful
- Assemble the pie:
- Pour this gorgeous filling over your peanut butter crumb layer and let it cool before chilling for at least two hours
- Make the whipped topping:
- Beat the heavy cream powdered sugar and vanilla until those perfect stiff peaks form
- Finish and serve:
- Spread the whipped cream over your completely chilled pie and sprinkle with the remaining peanut butter crumbs
 Pin to board
 My grandmother always said that dessert should taste like a hug from someone who loves you. This pie somehow manages to capture exactly that feeling in every single bite. It has become my go to comfort food for hard days and celebration days alike.
Making It Ahead
You can prepare the entire pie up to two days in advance which actually makes it even better. The flavors have time to meld together and the texture becomes even more velvety. Just keep it covered in the refrigerator until you are ready to serve.
Crust Options
While a standard pie crust works perfectly a graham cracker or shortbread crust adds another layer of flavor that complements the peanut butter beautifully. I have even used a chocolate cookie crust for extra indulgence. Bake whatever crust you choose until completely golden and cooled before filling.
Serving Suggestions
This pie is richest when served slightly chilled rather than ice cold from the refrigerator. Let it sit out for about ten minutes before slicing to get the perfect creamy texture.
- A drizzle of warm chocolate sauce takes this over the top
- Fresh berries on the side cut through all the richness nicely
- A strong cup of coffee is the perfect companion to this sweet treat
 Pin to board
 There is something so wonderful about a dessert that brings everyone back for seconds and thirds. This pie has never failed to create those happy full bellied moments around our table.
Recipe FAQs
- → How long does this peanut butter pie need to chill?
-
The pie requires at least 2 hours of refrigeration time to set completely. For best results, chill for 3-4 hours or until the filling is firm and holds its shape when sliced.
- → Can I make this pie ahead of time?
-
Yes, this Amish peanut butter dream pie is perfect for making ahead. You can prepare it up to 24 hours in advance and store it covered in the refrigerator. Add the whipped cream topping shortly before serving for the freshest presentation.
- → What type of peanut butter works best?
-
Creamy peanut butter is recommended for both the filling and crumbs. It blends smoothly into the custard and creates the perfect crumbly texture. Natural peanut butter can be used but may affect the consistency slightly.
- → Can I use a store-bought crust?
-
Absolutely. A prepared 9-inch pie crust works wonderfully. For extra flavor, consider a graham cracker or shortbread crust. Just ensure it's fully baked and cooled before adding the filling.
- → How do I know when the filling is thick enough?
-
The filling is ready when it thickens enough to coat the back of a spoon and just begins to bubble. This typically takes 4-5 minutes of constant whisking over medium heat. The mixture should appear glossy and smooth.
- → Can I freeze this peanut butter pie?
-
While possible, freezing may affect the texture of the whipped cream topping. For best results, freeze the pie without the whipped cream, then add fresh topping after thawing in the refrigerator for several hours.
